记录一次SpringBoot项目整合Swagger-UI3.0
AI 摘要鱼粮不足,AI 今天先歇着 · 正文在下面
一、准备
引入swagger3.0依赖
xml
        <!-- swagger3.0 -->
        <dependency>
            <groupId>io.springfox</groupId>
            <artifactId>springfox-boot-starter</artifactId>
            <version>3.0.0</version>
        </dependency>
编写application.yml配置文件
yaml
server:
  port: 10009
  servlet:
    context-path: "/backend"

spring:
  profiles:
    active: local
  application:
    name: admin-backend
# swagger3.0
springfox:
  documentation:
    enable: true
    application-name: '后台管理系统'
    application-version: 1.0
application-description: '接口文档'编写参数映射
java
/**
 * swagger 参数
 *
 * @author Salmon
 * @since 2023-04-18
 */
@Component
@ConfigurationProperties(prefix = "springfox.documentation")
@Data
public class SwaggerProperties {

    /**
     * 是否开启swagger,生产环境一般关闭,所以这里定义一个变量
     */
    private Boolean enable;

    /**
     * 项目应用名
     */
    private String applicationName;

    /**
     * 项目版本信息
     */
    private String applicationVersion;

    /**
     * 项目描述信息
     */
    private String applicationDescription;

    /**
     * 接口调试地址
     */
    private String tryHost;
}编写配置类
java
/**
 * swagger3 配置
 *
 * @author Salmon
 * @since 2023-04-18
 */
@Configuration
public class Swagger3Config {

    private final SwaggerProperties swaggerProperties;

    public Swagger3Config(SwaggerProperties swaggerProperties) {
        this.swaggerProperties = swaggerProperties;
    }

    /**
     * API 页面上半部分展示信息
     */
    private ApiInfo apiInfo() {
        return new ApiInfoBuilder()
                //页面标题
                .title(swaggerProperties.getApplicationName() + "API")
                //描述
                .description(swaggerProperties.getApplicationDescription())
                //创建人
                .contact(new Contact("Salmon", "", "1179732961@qq.com"))
                //版本号
                .version("Application Version: " + swaggerProperties.getApplicationVersion() + ", Spring Boot Version: " + SpringBootVersion.getVersion())
                .build();
    }

    /**
     * 设置授权信息
     */
    private List<SecurityScheme> securitySchemes() {
        ApiKey apiKey = new ApiKey("BASE_TOKEN", "token", In.HEADER.toValue());
        return Collections.singletonList(apiKey);
    }

    /**
     * 授权信息全局应用
     */
    private List<SecurityContext> securityContexts() {
        return Collections.singletonList(
                SecurityContext.builder()
                        .securityReferences(Collections.singletonList(new SecurityReference("BASE_TOKEN", new AuthorizationScope[]{new AuthorizationScope("global", "")})))
                        .build()
        );
    }

    @Bean
    public Docket createRestApi() {
        return new Docket(DocumentationType.OAS_30)
                .pathMapping("/")

                // 定义是否开启swagger,false为关闭,可以通过变量控制
                .enable(swaggerProperties.getEnable())

                // 将api的元信息设置为包含在json ResourceListing响应中
                .apiInfo(apiInfo())


                //全局响应
                .globalResponses(HttpMethod.GET, responseInfo())
                .globalResponses(HttpMethod.POST, responseInfo())

                // 选择哪些接口作为swagger的doc发布
                .select()
                .apis(RequestHandlerSelectors.withMethodAnnotation(ApiOperation.class))
                .paths(PathSelectors.any())
                .build()

                // 支持的通讯协议集合
                .protocols(newHashSet("https", "http"))

                // 授权信息设置,必要的header token等认证信息
                .securitySchemes(securitySchemes())

                // 授权信息全局应用
                .securityContexts(securityContexts())
                ;
    }

    private List<Response> responseInfo() {
        List<Response> responseMessages = new ArrayList<>();
        responseMessages.add(new ResponseBuilder().code(ReturnCodeEnum.CODE_200.getCode().toString()).build());
        return responseMessages;
    }
}编写解析器
java
/**
 * swagger3 解析
 *
 * @author Salmon
 * @since 2023-04-18
 */
@Component
public class SpringFoxSwaggerHostResolver implements WebMvcOpenApiTransformationFilter {

    @Override
    public OpenAPI transform(OpenApiTransformationContext<HttpServletRequest> context) {

        HttpServletRequest request = context.request().get();

        OpenAPI swagger = context.getSpecification();

        String scheme = "http";
        String referer = request.getHeader("Referer");

        if(StringUtils.hasLength(referer)){
            //获取协议
            scheme = referer.split(":")[0];
        }

        List<Server> servers = new ArrayList<>();
        String finalScheme = scheme;
        //重新组装server信息
        swagger.getServers().forEach(item->{

            //替换协议,去掉默认端口
            item.setUrl(clearDefaultPort(item.getUrl().replace("http", finalScheme)));
            servers.add(item);
        });
        swagger.setServers(servers);
        return swagger;
    }

    //清除默认端口
    private String clearDefaultPort(String url){
        String port = url.split(":")[2];
        if("80".equals(port)||"443".equals(port)){
            return url.replace(":80","").replace(":443","");
        }
        return url;
    }

    @Override
    public boolean supports(DocumentationType documentationType) {
        return documentationType.equals(DocumentationType.OAS_30);
    }
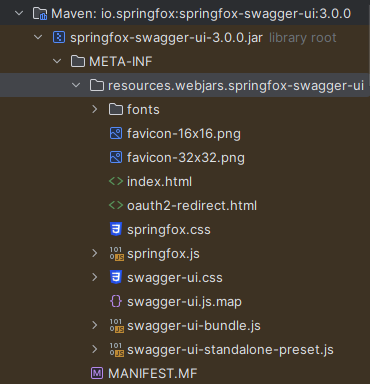
}编写swagger的资源配置,不然访问不到swagger的资源
java
/**
 * web配置类
 *
 * @author Salmon
 * @since 2023-04-18
 */
@Configuration
public class WebConfig implements WebMvcConfigurer {

    /**
     * SpringBoot自动配置本身并不会把/swagger-ui/index.html这个路径映射到对应的目录 /webjars/springfox-swagger-ui/下面。我们加上这个映射即可
     *
     * @param registry 资源
     */
    @Override
    public void addResourceHandlers(ResourceHandlerRegistry registry) {
        registry.
                addResourceHandler("/swagger-ui/**")
                .addResourceLocations("classpath:/META-INF/resources/webjars/springfox-swagger-ui/")
                .resourceChain(false);
    }

    @Override
    public void addViewControllers(ViewControllerRegistry registry) {
        registry.addViewController("/swagger-ui/")
                .setViewName("forward:/swagger-ui/index.html");
    }
}如果有用shiro的,还得配置下
java
    /**
     * Shiro的Web过滤器Factory 命名:shiroFilter
     */
    @Bean(name = "shiroFilter")
    public ShiroFilterFactoryBean shiroFilterFactoryBean(SecurityManager securityManager) {
        ShiroFilterFactoryBean shiroFilterFactoryBean = new ShiroFilterFactoryBean();
        //Shiro的核心安全接口,这个属性是必须的
        shiroFilterFactoryBean.setSecurityManager(securityManager);
        Map<String, Filter> filterMap = new LinkedHashMap<>();
        filterMap.put("authc", new AjaxPermissionsAuthorizationFilter());
        shiroFilterFactoryBean.setFilters(filterMap);
        /*定义shiro过滤链  Map结构
         * Map中key(xml中是指value值)的第一个'/'代表的路径是相对于HttpServletRequest.getContextPath()的值来的
         * anon:它对应的过滤器里面是空的,什么都没做,这里.do和.jsp后面的*表示参数,比方说login.jsp?main这种
         * authc:该过滤器下的页面必须验证后才能访问,它是Shiro内置的一个拦截器org.apache.shiro.web.filter.authc.FormAuthenticationFilter
         */
        Map<String, String> filterChainDefinitionMap = new LinkedHashMap<>();
         /* 过滤链定义,从上向下顺序执行,一般将 / ** 放在最为下边:这是一个坑呢,一不小心代码就不好使了;
          authc:所有url都必须认证通过才可以访问; anon:所有url都都可以匿名访问 */
        filterChainDefinitionMap.put("/**/system/user/login", "anon");
        filterChainDefinitionMap.put("/**/system/user/logout", "anon");
        //swagger-ui
        filterChainDefinitionMap.put("/**/swagger-ui.html", "anon");
        filterChainDefinitionMap.put("/**/swagger-resources", "anon");
        filterChainDefinitionMap.put("/**/v2/api-docs", "anon");
        filterChainDefinitionMap.put("/**/webjars/springfox-swagger-ui/**", "anon");
        filterChainDefinitionMap.put("/**/configuration/security", "anon");
        filterChainDefinitionMap.put("/**/configuration/ui", "anon");
        //登录时的图形验证码
        filterChainDefinitionMap.put("/**/system/kaptcha/code", "anon");
        filterChainDefinitionMap.put("/**/record/withdrawLog/callback", "anon");
        filterChainDefinitionMap.put("/**", "authc");
        shiroFilterFactoryBean.setFilterChainDefinitionMap(filterChainDefinitionMap);
        return shiroFilterFactoryBean;
}在需要的Controller中加入注解和entity加入注解,例如
java
/**
 * 用户 前端控制器
 *
 * @author Salmon
 * @since 2023-04-18
 */
@RestController
@RequestMapping("/user/user")
@AllArgsConstructor
@Api(tags = "用户接口API")
@Slf4j
public class UserController extends BaseController {

    private final IUserService userService;

    /**
     * 新增
     *
     * @param user          要新增的实体类
     * @param bindingResult 校验结果对象
     */
    @PostMapping("/add")
    @RequiresPermissions("user:user:add")
    @ApiOperation(value = "新增user对象")
    @OperateLog(methodDesc = "新增user", moduleName = "user")
    public BaseResponse add(@RequestBody @Validated(value = {AddValidate.class}) User user, BindingResult bindingResult) {
        if (bindingResult.hasErrors()) {
            return BaseResponseUtil.validateFail(bindingResult);
        }
        log.info("新增User:{}", user);
        return BaseResponseUtil.result(userService.save(user.setCreateTime(LocalDateTime.now())));
    }
}
java
/**
 * 用户
 *
 * @author Salmon
 * @since 2023-04-18
 */
@Data
@EqualsAndHashCode(callSuper = false)
@Accessors(chain = true)
@TableName("tt_user")
@ApiModel(value = "User对象", description = "用户")
public class User implements Serializable {

    private static final long serialVersionUID = 1L;

    @NotNull(groups = {UpdateValidate.class}, message = "ID不能为空")
    @TableId(value = "id", type = IdType.AUTO)
    @ApiModelProperty(value = "ID")
    private Integer id;

    @ApiModelProperty(value = "手机号")
    private String account;
}编写前端swagger页面
html
<template>
  <div>
    <iframe src="http://localhost:10009/backend/swagger-ui/index.html"
            ref="sw"></iframe>
  </div>
</template>

<script>
export default {
  name: "SwaggerUI",
  mounted(){
    /**
     * iframe-宽高自适应显示
     */
    this.changeIframe()
  },
  methods:{
    changeIframe(){
      const deviceWidth = document.body.clientWidth;
      const deviceHeight = document.body.clientHeight;
      this.$refs.sw.style.position = 'absolute';
      this.$refs.sw.style.width = (Number(deviceWidth) - Number(deviceWidth) * 0.13) + 'px'; //数字是页面布局宽度差值
      this.$refs.sw.style.height = (Number(deviceHeight)) + 'px'; //数字是页面布局高度差
    }
  }
}
</script>

<style scoped>
</style>配置路由
js
import Vue from 'vue';
import Router from 'vue-router';

Vue.use(Router);
export const constantRoutes = [
   {
      path: '/swagger',
      name: '接口文档',
      component: () => import('@/views/system/SwaggerUI'),
      meta: {
        title: '接口文档',
        keepAlive: true
      }
    }
]
const createRouter = () =>
  new Router({
    mode: 'history', // require service support
    scrollBehavior: () => ({
      y: 0
    }),
    routes: constantRoutes
  });

const router = createRouter();

export default router;二、测试
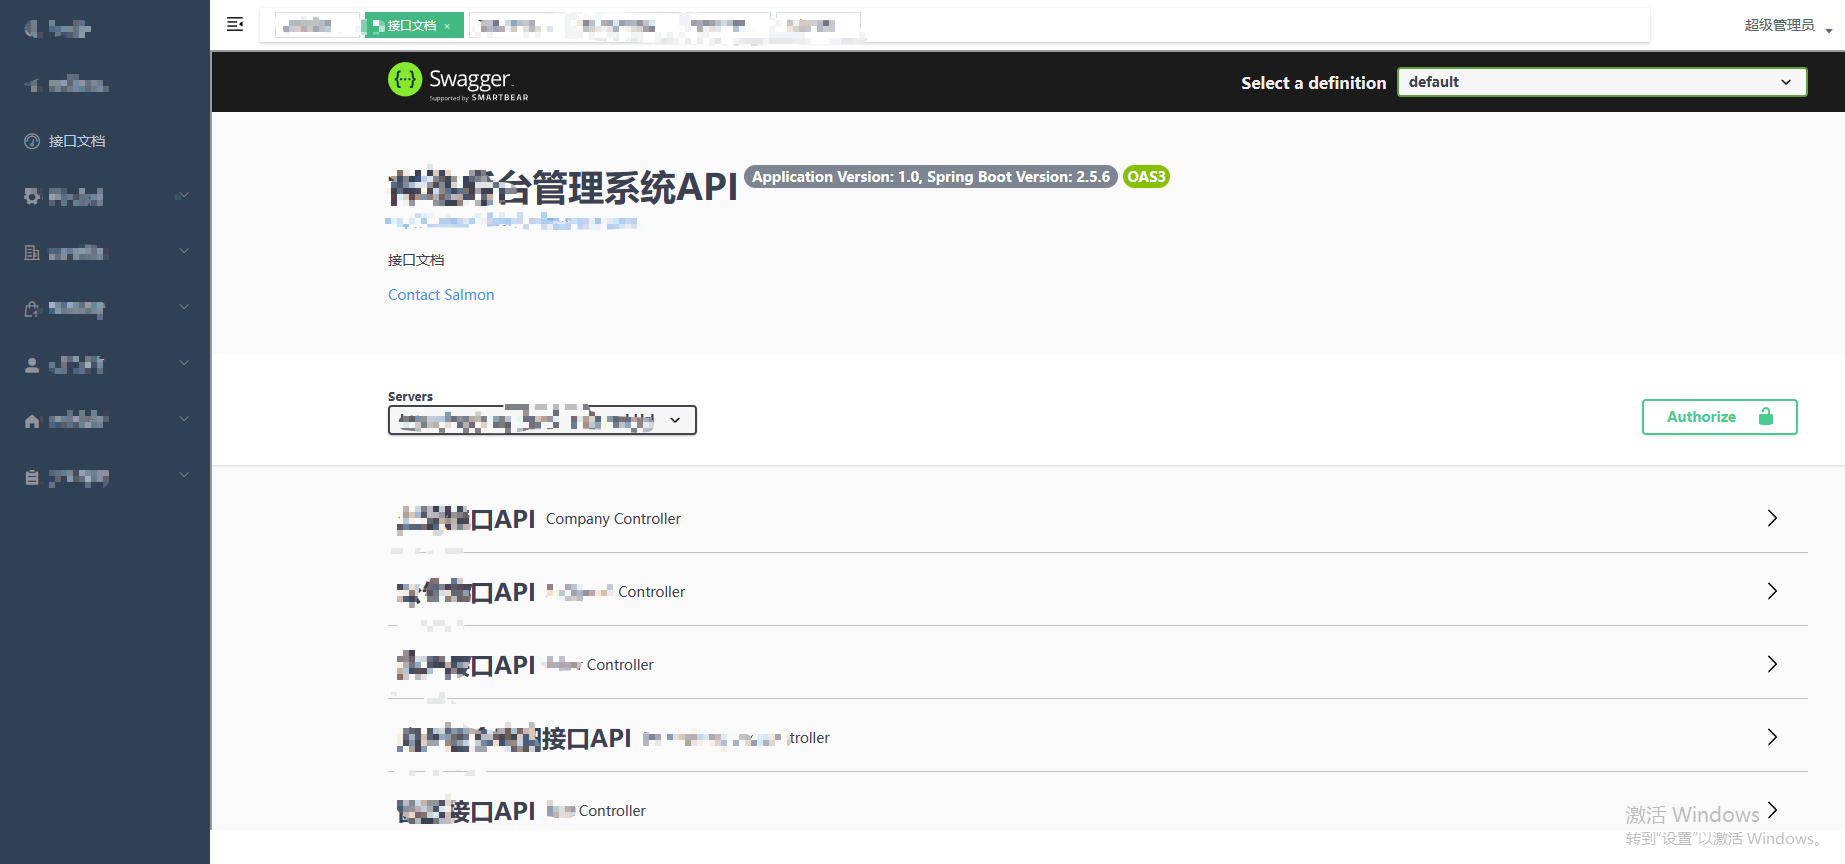
登录系统,点击接口文档菜单,即可正常访问
评论
0 条—
还没有评论,来说第一句