使用geth1.11.6基于POA搭建以太坊私链
本文
1、安装geth
这一块我就不再做说明了,可以看看我其它文章
2、搭建私链
2.1、创建数据目录
sh
mkdir -p /mnt/mypoa/node1
mkdir -p /mnt/mypoa/node2
cd /mnt/mypoa
2.2、创建账号
创建两个节点账号
sh
geth --datadir node1 account new
geth --datadir node2 account new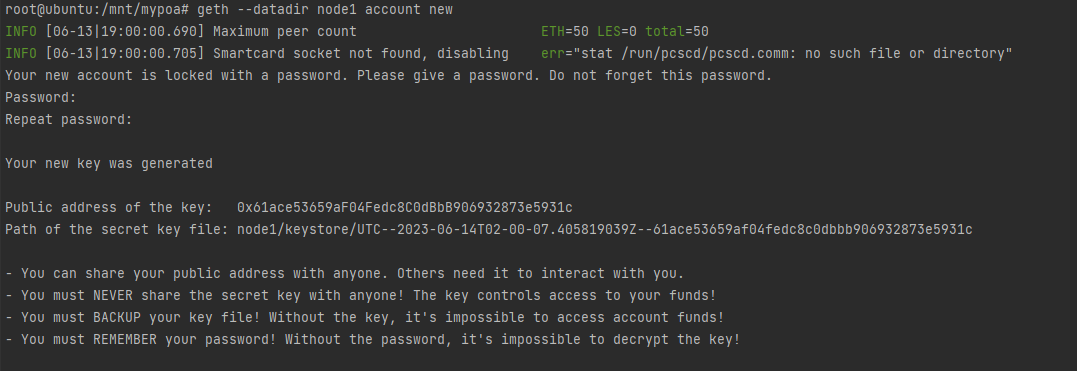
记录账号和密码
bash
echo "0x61ace53659aF04Fedc8C0dBbB906932873e5931c" >> account.txt
echo "0x8db203caAf8422DBb0b8609D82fD5546C36F4432" >> account.txt
echo "salmon" > node1/password.txt
echo "salmon" > node2/password.txt
当前的节点目录


2.3、编辑初始配置
2023年起不再支持puppeth工具来初始化生成配置,只能我们自己编辑创世区块配置genesis.json,在基于POA共识算法中,extraData必须按规定设置
json
{
  "config": {
    "chainId": 4562,
    "homesteadBlock": 0,
    "eip150Block": 0,
    "eip155Block": 0,
    "eip158Block": 0,
    "byzantiumBlock": 0,
    "constantinopleBlock": 0,
    "petersburgBlock": 0,
    "istanbulBlock": 0,
    "clique": {
      "period": 5,
      "epoch": 30000
    }
  },

  "nonce": "0x0000000000000042",
  "timestamp": "0x624ed1f0",
  "extraData": "0x00000000000000000000000000000000000000000000000000000000000000008db203caAf8422DBb0b8609D82fD5546C36F443200000000000000000000000000000000000000000000000000000000000000000000000000000000000000000000000000000000000000000000000000000000000",
  "gasLimit": "0x47b760",
  "difficulty": "0x25896",
  "mixhash": "0x0000000000000000000000000000000000000000000000000000000000000000",
  "coinbase": "0x0000000000000000000000000000000000000000",
  "alloc": {
    "0000000000000000000000000000000000000000": {
      "balance": "0x1"
    },
    "0x61ace53659aF04Fedc8C0dBbB906932873e5931c": {
      "balance": "0x200000000000000000000000000000000000000000000000000000000000000"
    },
    "0x8db203caAf8422DBb0b8609D82fD5546C36F4432": {
      "balance": "0x200000000000000000000000000000000000000000000000000000000000000"
    }
  },
  "number": "0x0",
  "gasUsed": "0x0",
  "parentHash": "0x0000000000000000000000000000000000000000000000000000000000000000",
  "baseFeePerGas": null
}2.3、初始化创世区块配置
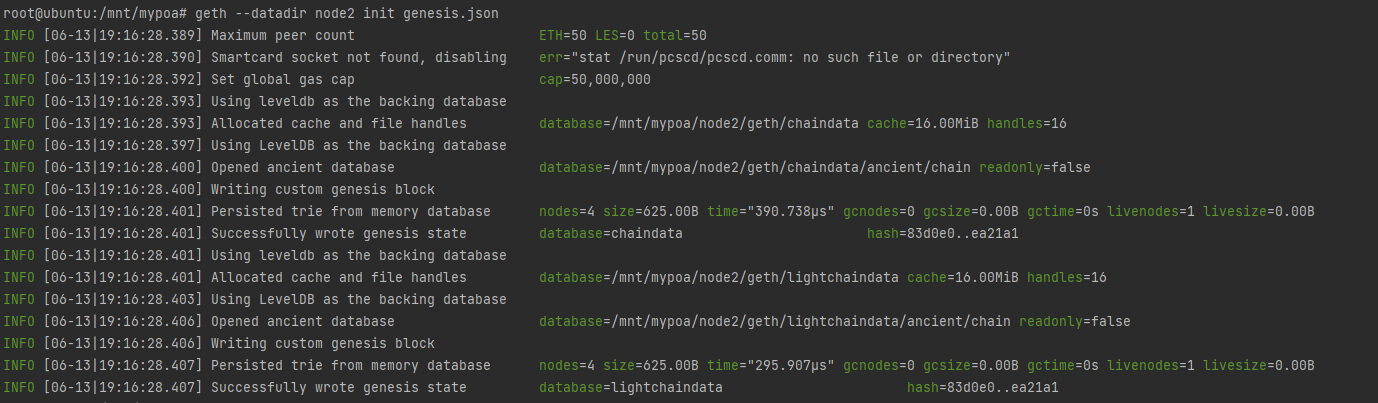
给每个节点进行初始化
bash
geth --datadir node1 init genesis.json
geth --datadir node2 init genesis.json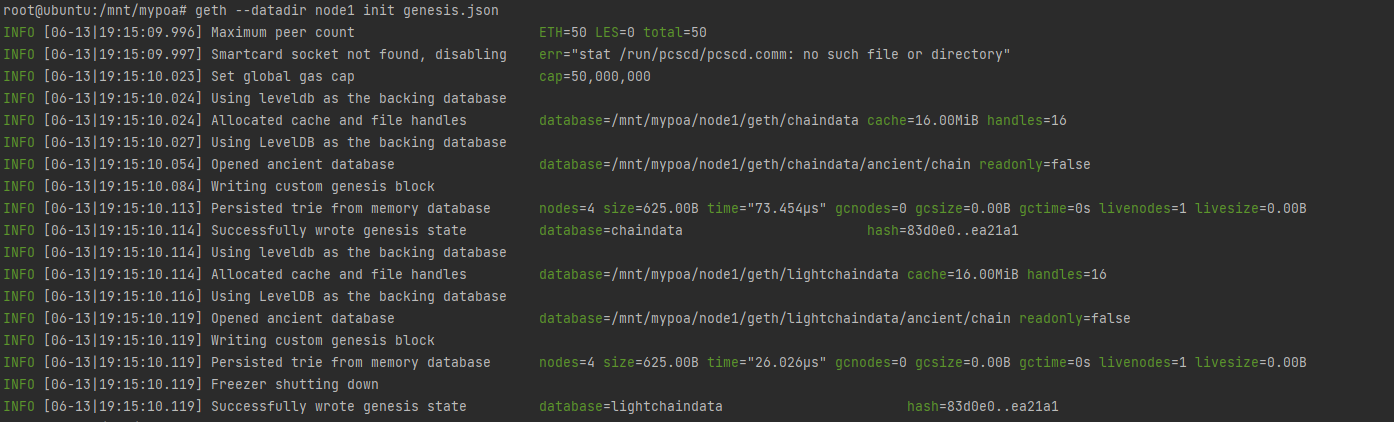
2.4 启动引导节点bootnode
创建一个目录bnode,然后执行以下命令,生成boot.key
bash
bootnode -genkey ./bnode/boot.key使用bootnode和刚才生成的boot.key启动引导节点:
提示信息说bootnode是开发工具,如果是生产环境的话使用一个正常的节点作为引导节点
bash
bootnode -nodekey ./bnode/boot.key
但发现关闭终端他就结束进程了,我们可以写一个启动脚本bnode.sh,让它在后台运行
bash
bootnode -nodekey ./bnode/boot.key > bnode.log 2>&1 &2.5、启动成员节点
启动node1
bash
geth --datadir /mnt/mypoa/node1 --identity "node1" --networkid 4562 --cache=8192 --bootnodes enode://ed34ab99aa0c85dc7856ae813564ec50316994affcfe0d9fca90512763283384e47a4ef02a0455ca1ce62e933a69cf447415da5e9528b50745aa2c758c069423@127.0.0.1:0?discport=30301 --port 30303 --syncmode full --http --http.addr "0.0.0.0" --http.port 8545 --http.api "eth,net,web3,personal,miner" --mine --allow-insecure-unlock --unlock "0x61ace53659aF04Fedc8C0dBbB906932873e5931c" --password /mnt/mypoa/node1/password.txt发现报错了,原因是因为没有指定etherbase
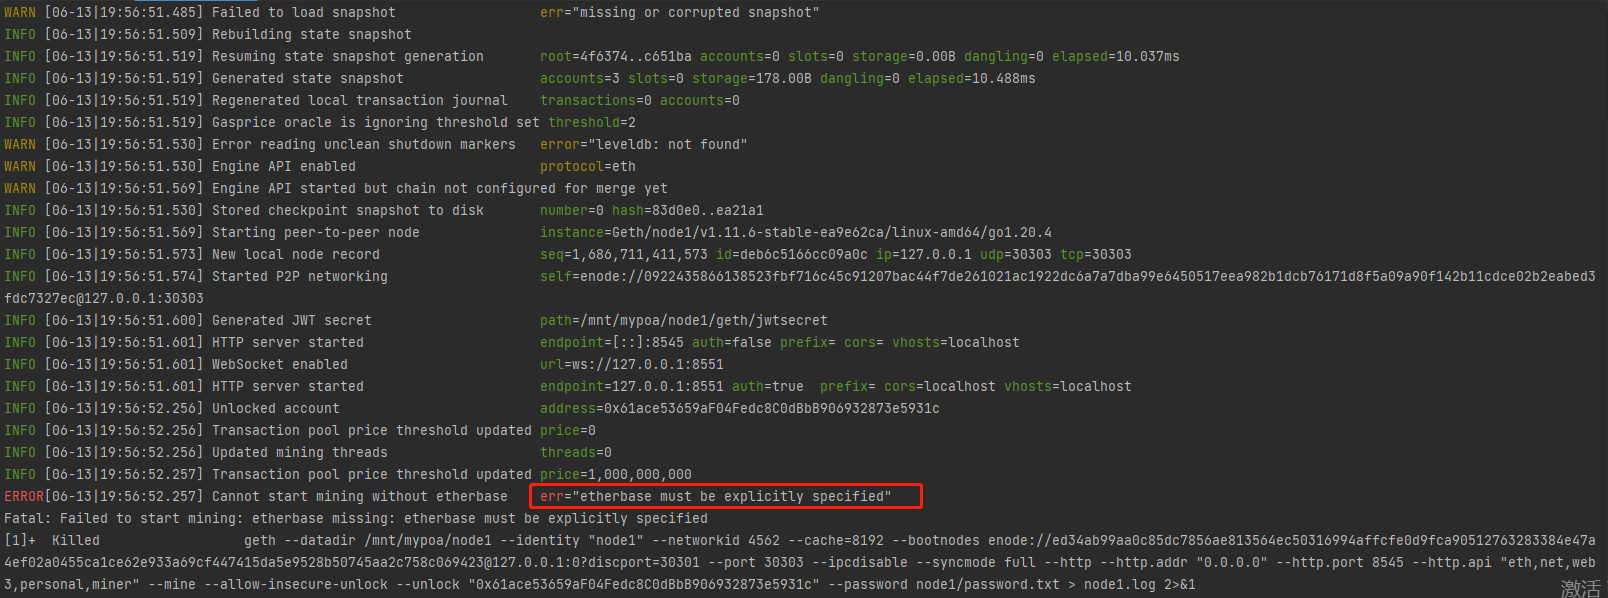
我们指定下重新运行
bash
geth --datadir /mnt/mypoa/node1 --identity "node1" --networkid 4562 --cache=8192 --bootnodes enode://ed34ab99aa0c85dc7856ae813564ec50316994affcfe0d9fca90512763283384e47a4ef02a0455ca1ce62e933a69cf447415da5e9528b50745aa2c758c069423@127.0.0.1:0?discport=30301 --port 30303 --syncmode full --http --http.addr "0.0.0.0" --http.port 8545 --http.api "eth,net,web3,personal,miner" --mine --miner.etherbase=0x61ace53659aF04Fedc8C0dBbB906932873e5931c --allow-insecure-unlock --unlock "0x61ace53659aF04Fedc8C0dBbB906932873e5931c" --password /mnt/mypoa/node1/password.txt发现报错unauthorized signer
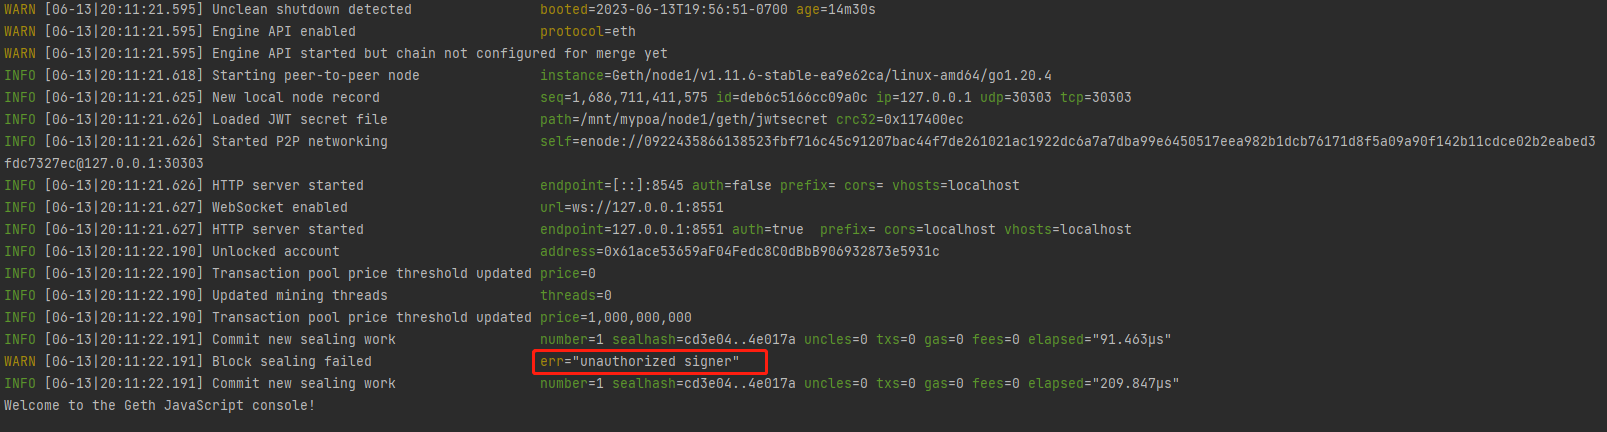
经过查阅,发现需要etherbase与extraData中指定的账号一致,参考文章
我这边指定的是0x8db203caAf8422DBb0b8609D82fD5546C36F4432
bash
geth --datadir /mnt/mypoa/node1 --identity "node1" --networkid 4562 --cache=8192 --bootnodes enode://ed34ab99aa0c85dc7856ae813564ec50316994affcfe0d9fca90512763283384e47a4ef02a0455ca1ce62e933a69cf447415da5e9528b50745aa2c758c069423@127.0.0.1:0?discport=30301 --port 30303 --authrpc.port 8551 --syncmode full --http --http.addr "0.0.0.0" --http.port 8545 --http.api "eth,net,web3,personal,miner" --mine --miner.etherbase=0x8db203caAf8422DBb0b8609D82fD5546C36F4432 --allow-insecure-unlock --unlock "0x61ace53659aF04Fedc8C0dBbB906932873e5931c" --password /mnt/mypoa/node1/password.txt console报错,需要解锁该账号
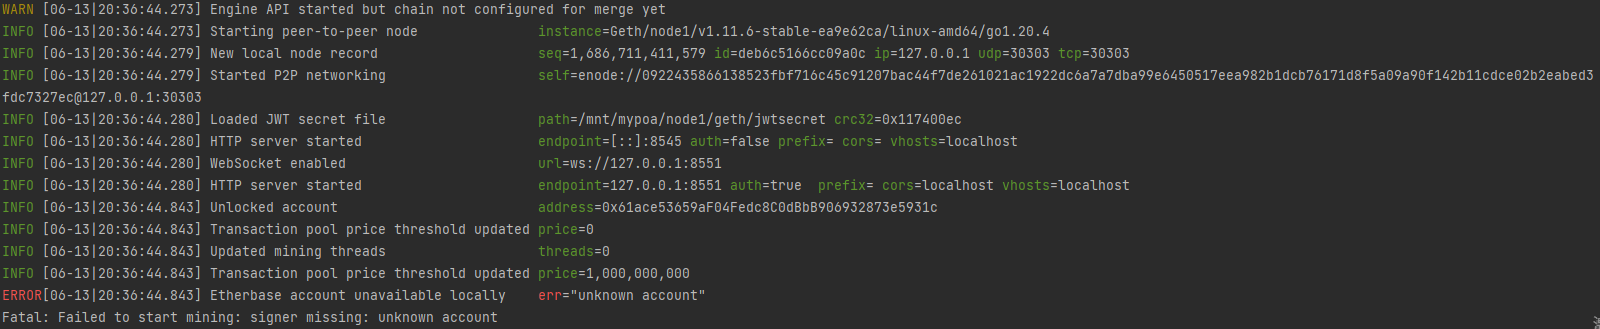
我们修改下命令多解锁一个账号,密码本注意也要增加密码(对应账号的密码),如下:
bash
geth --datadir /mnt/mypoa/node1 --identity "node1" --networkid 4562 --cache=8192 --bootnodes enode://ed34ab99aa0c85dc7856ae813564ec50316994affcfe0d9fca90512763283384e47a4ef02a0455ca1ce62e933a69cf447415da5e9528b50745aa2c758c069423@127.0.0.1:0?discport=30301 --port 30303 --authrpc.port 8551 --syncmode full --http --http.addr "0.0.0.0" --http.port 8545 --http.api "eth,net,web3,personal,miner" --mine --miner.etherbase=0x8db203caAf8422DBb0b8609D82fD5546C36F4432 --allow-insecure-unlock --unlock "0x61ace53659aF04Fedc8C0dBbB906932873e5931c,0x8db203caAf8422DBb0b8609D82fD5546C36F4432" --password /mnt/mypoa/node1/password.txt
发现报错,无法解锁该账号,因为该账号创建在node2目录下

那我们先启动node2,重新打开一个终端,输入以下命令
bash
geth --datadir /mnt/mypoa/node2 --identity "node2" --networkid 4562 --cache=8192 --bootnodes enode://ed34ab99aa0c85dc7856ae813564ec50316994affcfe0d9fca90512763283384e47a4ef02a0455ca1ce62e933a69cf447415da5e9528b50745aa2c758c069423@127.0.0.1:0?discport=30301 --port 30304 --authrpc.port 8552 --syncmode full --http --http.addr "0.0.0.0" --http.port 8546 --http.api "eth,net,web3,personal,miner" --mine --miner.etherbase=0x8db203caAf8422DBb0b8609D82fD5546C36F4432 --allow-insecure-unlock --unlock "0x8db203caAf8422DBb0b8609D82fD5546C36F4432" --password /mnt/mypoa/node2/password.txt可以发现启动成功了,区块高度也从0开始增加到了1400+
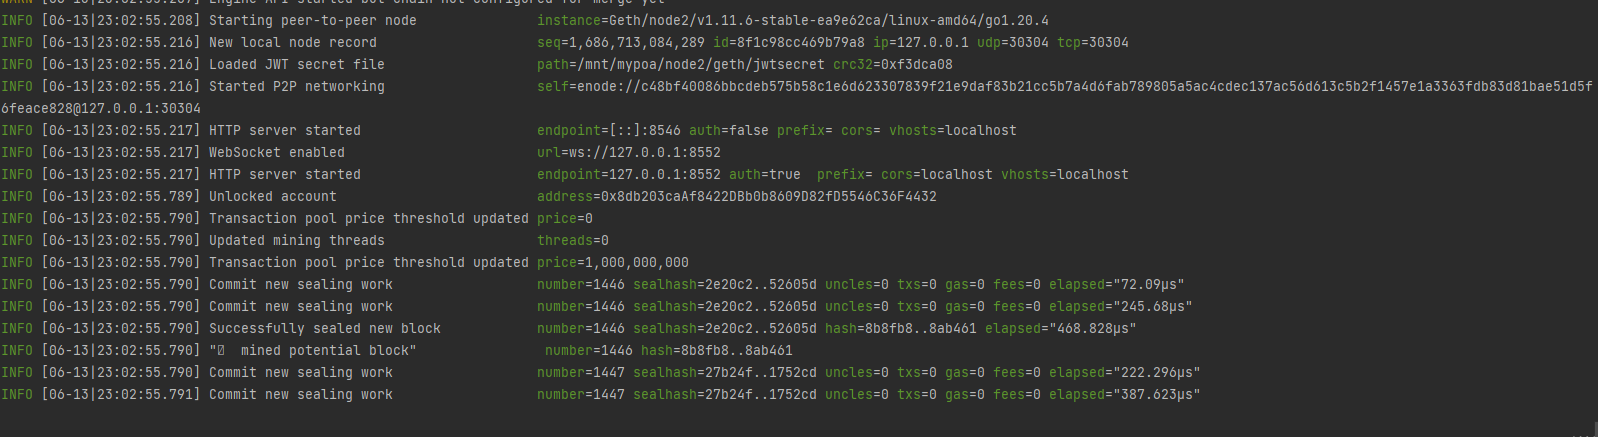
我们重新启动node1,把node2作为签名者节点
bash
geth --datadir /mnt/mypoa/node1 --identity "node1" --networkid 4562 --cache=8192 --bootnodes enode://ed34ab99aa0c85dc7856ae813564ec50316994affcfe0d9fca90512763283384e47a4ef02a0455ca1ce62e933a69cf447415da5e9528b50745aa2c758c069423@127.0.0.1:0?discport=30301 --port 30303 --authrpc.port 8551 --syncmode full --http --http.addr "0.0.0.0" --http.port 8545 --http.api "eth,net,web3,personal,miner" --allow-insecure-unlock --unlock "0x61ace53659aF04Fedc8C0dBbB906932873e5931c" --password /mnt/mypoa/node1/password.txt可以看到区块高度同步过来了
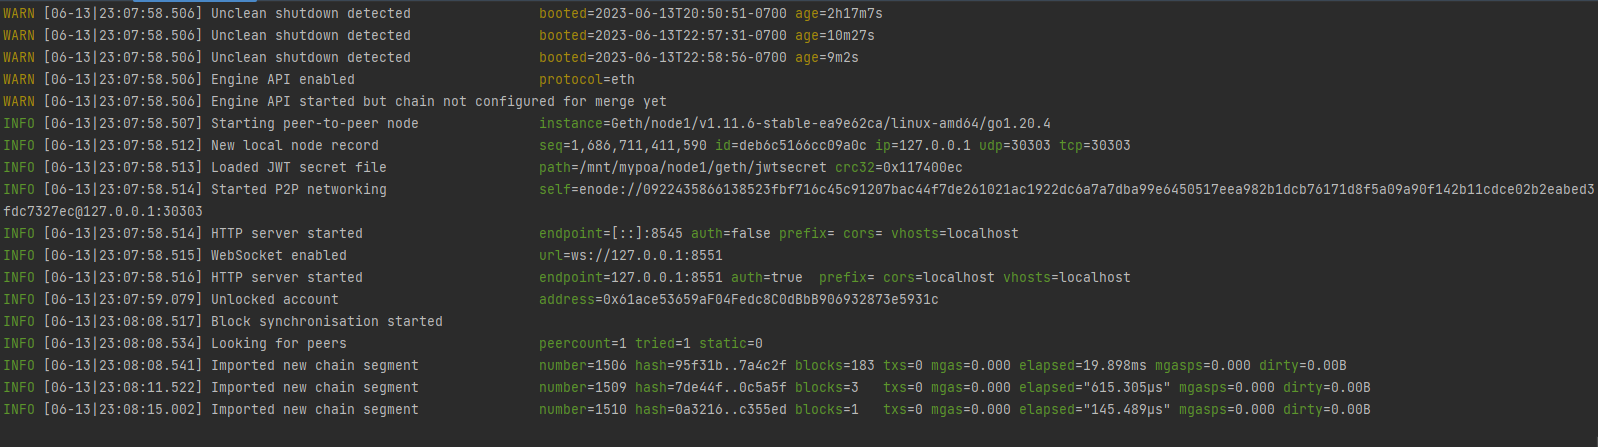
2.6、编写节点启动脚本
bash
echo 'geth --datadir /mnt/mypoa/node1 --identity "node1" --networkid 4562 --cache=8192 --bootnodes enode://ed34ab99aa0c85dc7856ae813564ec50316994affcfe0d9fca90512763283384e47a4ef02a0455ca1ce62e933a69cf447415da5e9528b50745aa2c758c069423@127.0.0.1:0?discport=30301 --port 30303 --authrpc.port 8551 --syncmode full --http --http.addr "0.0.0.0" --http.port 8545 --http.api "eth,net,web3,personal,miner" --allow-insecure-unlock --unlock "0x61ace53659aF04Fedc8C0dBbB906932873e5931c" --password /mnt/mypoa/node1/password.txt > node1.log 2>&1 &' >> node1.sh
bash
echo 'geth --datadir /mnt/mypoa/node2 --identity "node2" --networkid 4562 --cache=8192 --bootnodes enode://ed34ab99aa0c85dc7856ae813564ec50316994affcfe0d9fca90512763283384e47a4ef02a0455ca1ce62e933a69cf447415da5e9528b50745aa2c758c069423@127.0.0.1:0?discport=30301 --port 30304 --authrpc.port 8552 --syncmode full --http --http.addr "0.0.0.0" --http.port 8546 --http.api "eth,net,web3,personal,miner" --mine --miner.etherbase=0x8db203caAf8422DBb0b8609D82fD5546C36F4432 --allow-insecure-unlock --unlock "0x8db203caAf8422DBb0b8609D82fD5546C36F4432" --password /mnt/mypoa/node2/password.txt > node2.log 2>&1 &' >> node2.sh
bash
echo 'geth attach ipc:/mnt/mypoa/node1/geth.ipc' >> console1.sh
bash
echo 'geth attach ipc:/mnt/mypoa/node2/geth.ipc' >> console2.sh2.7、后台启动节点
我们在后台启动1、2节点
bash
./node1.sh
./node2.sh
我们进入node2的交互界面
bash
./console2.sh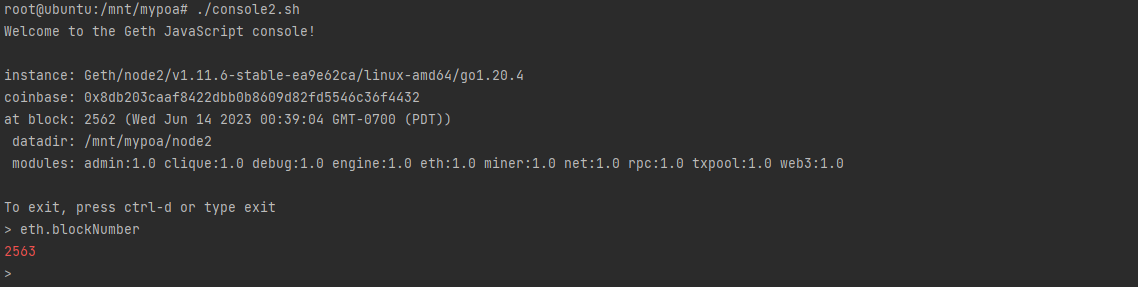
可以看到当前节点的区块高度已经到了2562,我们去看看node1的,发现也有正常同步
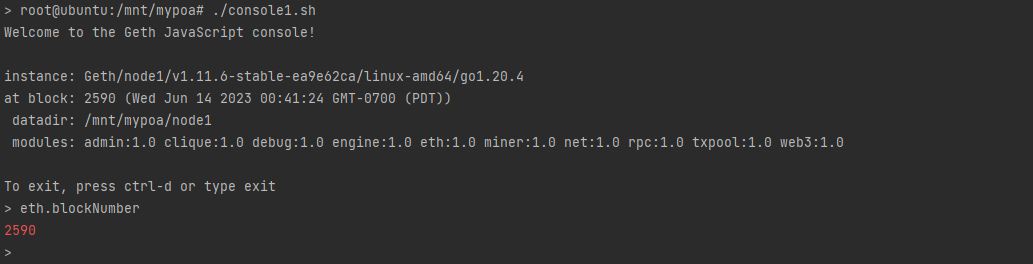
2.8、测试
我来测下杀死进程后,数据是否会丢失,首先发送一笔交易,记录下返回的区块哈希:0x22e29604f13720a101ba6ba6abc758a2bbe4ed2868b1d009bad41a4f1811deb6
js
eth.sendTransaction({from:eth.accounts[0],to:"0x61ace53659af04fedc8c0dbbb906932873e5931c",value:web3.toWei(1,"ether")})
然后把node2的进程杀死

看看node1的区块高度,可以发现已经停止变化了
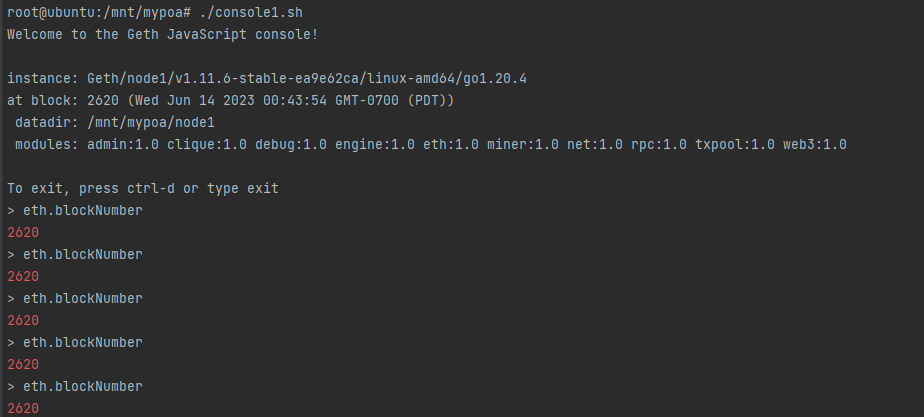
我们也把node1的进程杀掉

重启下node2,看看数据有无丢失
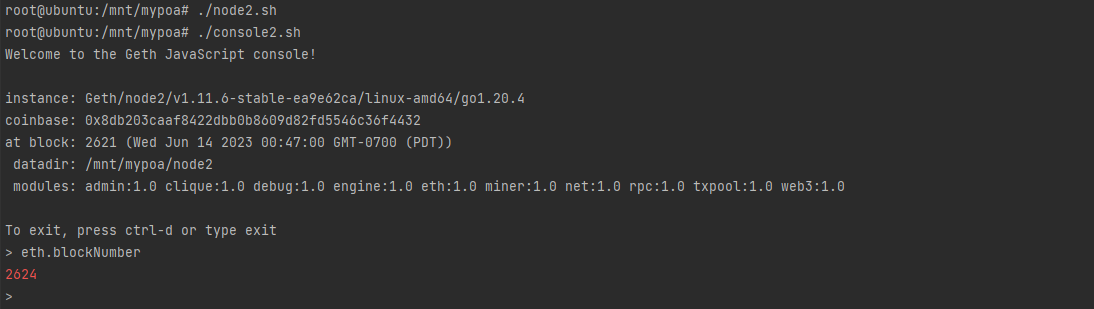
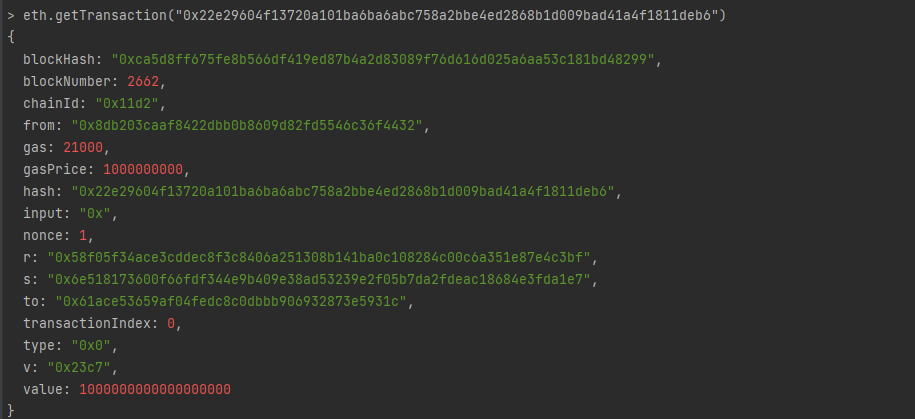
可以看到数据无丢失,我们看看之前的交易信息,发现数据也无丢失
js
eth.getTransaction("0x22e29604f13720a101ba6ba6abc758a2bbe4ed2868b1d009bad41a4f1811deb6")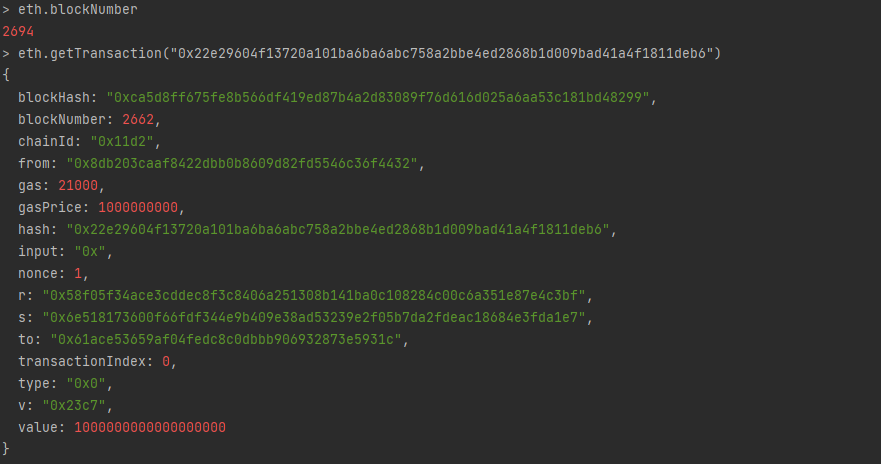
看看node1的,也很快的同步到了最新数据
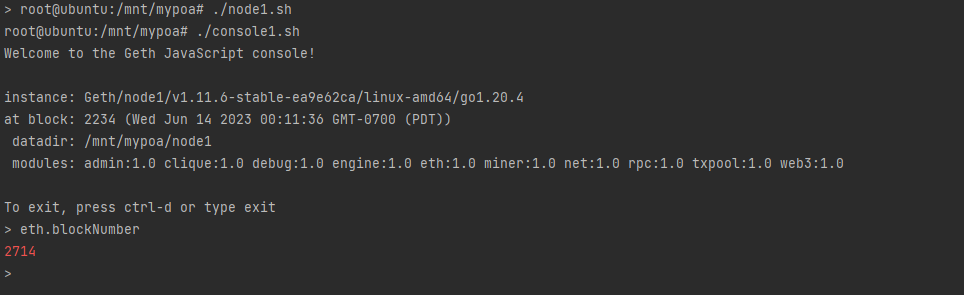
3、双节点启动
3.1、创世区块配置
编写创世区块配置,extraData包含两个验证者的地址,参照官方文档上的说明:

json
{
  "config": {
    "chainId": 4562,
    "homesteadBlock": 0,
    "eip150Block": 0,
    "eip155Block": 0,
    "eip158Block": 0,
    "byzantiumBlock": 0,
    "constantinopleBlock": 0,
    "petersburgBlock": 0,
    "istanbulBlock": 0,
    "clique": {
      "period": 5,
      "epoch": 30000
    }
  },

  "nonce": "0x0000000000000042",
  "timestamp": "0x624ed1f0",
  "extraData": "0x00000000000000000000000000000000000000000000000000000000000000008db203caAf8422DBb0b8609D82fD5546C36F443261ace53659aF04Fedc8C0dBbB906932873e5931c0000000000000000000000000000000000000000000000000000000000000000000000000000000000000000000000000000000000000000000000000000000000",
  "gasLimit": "0x47b760",
  "difficulty": "0x25896",
  "mixhash": "0x0000000000000000000000000000000000000000000000000000000000000000",
  "coinbase": "0x0000000000000000000000000000000000000000",
  "alloc": {
    "0000000000000000000000000000000000000000": {
      "balance": "0x1"
    },
    "0x61ace53659aF04Fedc8C0dBbB906932873e5931c": {
      "balance": "0x200000000000000000000000000000000000000000000000000000000000000"
    },
    "0x8db203caAf8422DBb0b8609D82fD5546C36F4432": {
      "balance": "0x200000000000000000000000000000000000000000000000000000000000000"
    }
  },
  "number": "0x0",
  "gasUsed": "0x0",
  "parentHash": "0x0000000000000000000000000000000000000000000000000000000000000000",
  "baseFeePerGas": "7"
}3.2、初始化配置
初始化私链
bash
# 删除原本节点的数据
geth removedb --datadir node1
geth removedb --datadir node2
# 初始化私链
geth --datadir node1 init genesis.json
geth --datadir node2 init genesis.json
3.3、启动私链
bash
# node1
geth --datadir /mnt/mypoa/node1  --identity "node1" --networkid 4562 --cache=8192 --bootnodes enode://ed34ab99aa0c85dc7856ae813564ec50316994affcfe0d9fca90512763283384e47a4ef02a0455ca1ce62e933a69cf447415da5e9528b50745aa2c758c069423@127.0.0.1:0?discport=30301 --port 30303 --authrpc.port 8551 --syncmode full --http --http.addr "0.0.0.0" --http.port 8545 --http.api "eth,net,web3,personal,miner"  --allow-insecure-unlock --mine --miner.etherbase=0x61ace53659aF04Fedc8C0dBbB906932873e5931c --unlock "0x61ace53659aF04Fedc8C0dBbB906932873e5931c" --password /mnt/mypoa/node1/password.txt > node1.log 2>&1 &
# node2
geth --datadir /mnt/mypoa/node2  --identity "node2" --networkid 4562 --cache=8192 --bootnodes enode://ed34ab99aa0c85dc7856ae813564ec50316994affcfe0d9fca90512763283384e47a4ef02a0455ca1ce62e933a69cf447415da5e9528b50745aa2c758c069423@127.0.0.1:0?discport=30301 --port 30304 --authrpc.port 8552 --syncmode full --http --http.addr "0.0.0.0" --http.port 8546 --http.api "eth,net,web3,personal,miner" --mine --miner.etherbase=0x8db203caAf8422DBb0b8609D82fD5546C36F4432 --allow-insecure-unlock --unlock "0x8db203caAf8422DBb0b8609D82fD5546C36F4432" --password /mnt/mypoa/node2/password.txt > node2.log 2>&1 &
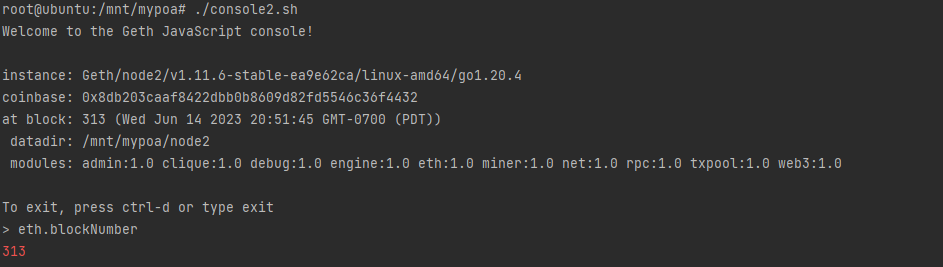
访问node1与node2,查看数据是否有同步,可以看到数据两个节点的数据有同步
bash
# 访问node1
geth attach ipc:/mnt/mypoa/node1/geth.ipc
# 访问node2
geth attach ipc:/mnt/mypoa/node2/geth.ipc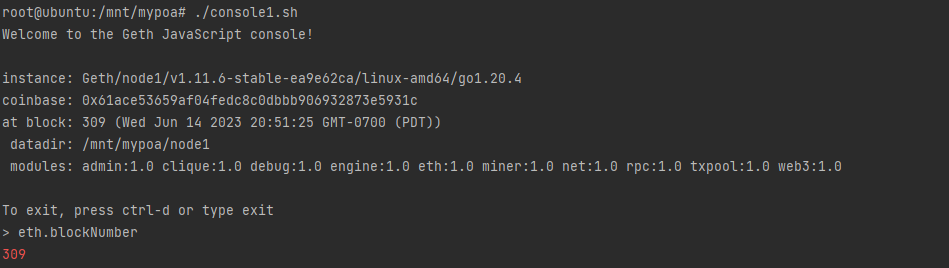
3.4、测试
3.4.1、区块的产生是否需要认证者
停止一个节点运行,看看另一个节点是否会继续产生新块,这里我停掉node1的进程
bash
ps -ef | grep node
kill -9 <pid>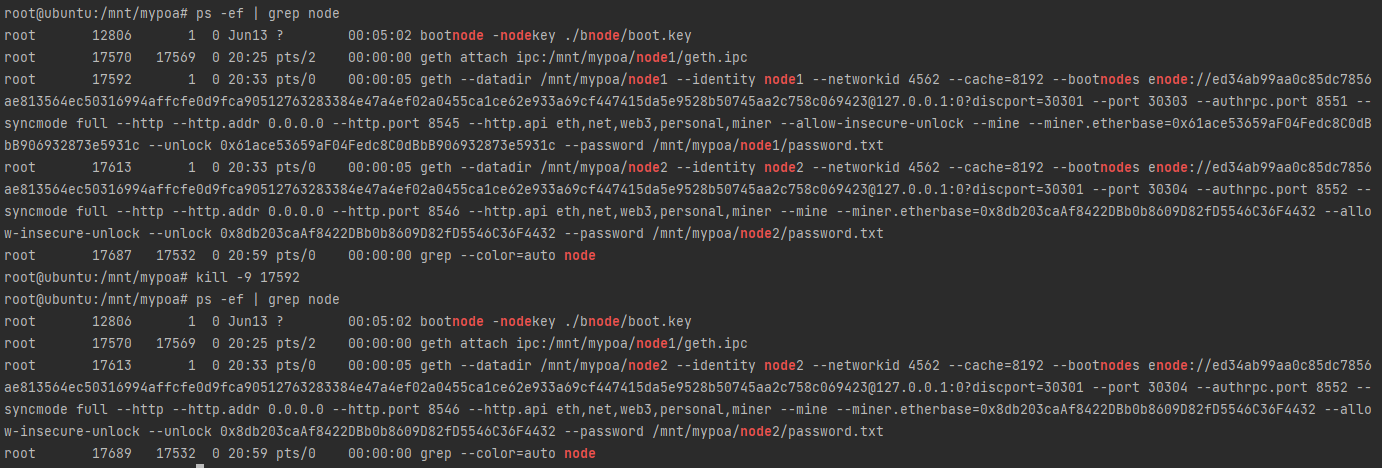
我们看看node2,可以看到停止产出新的区块了
bash
geth attach ipc:/mnt/mypoa/node2/geth.ipc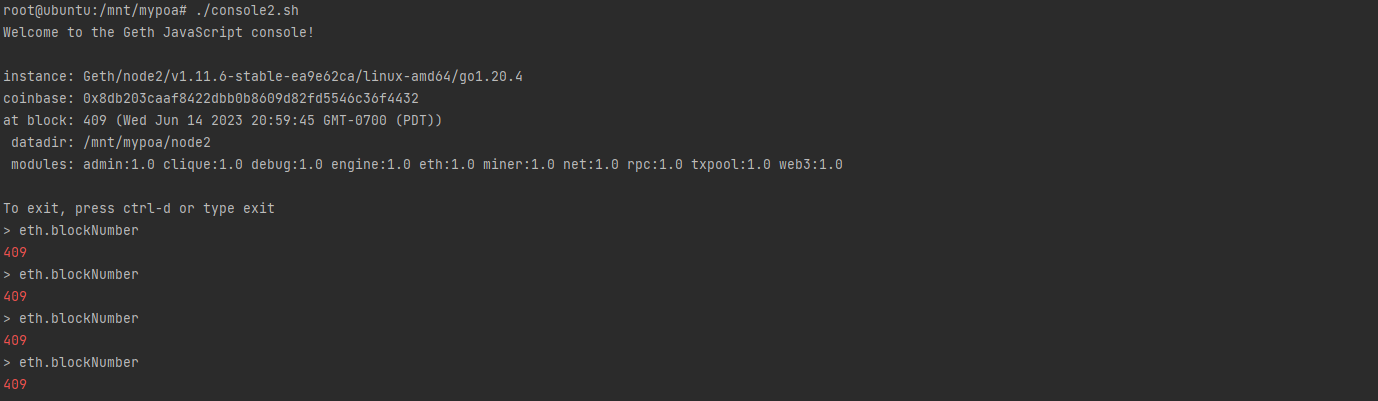
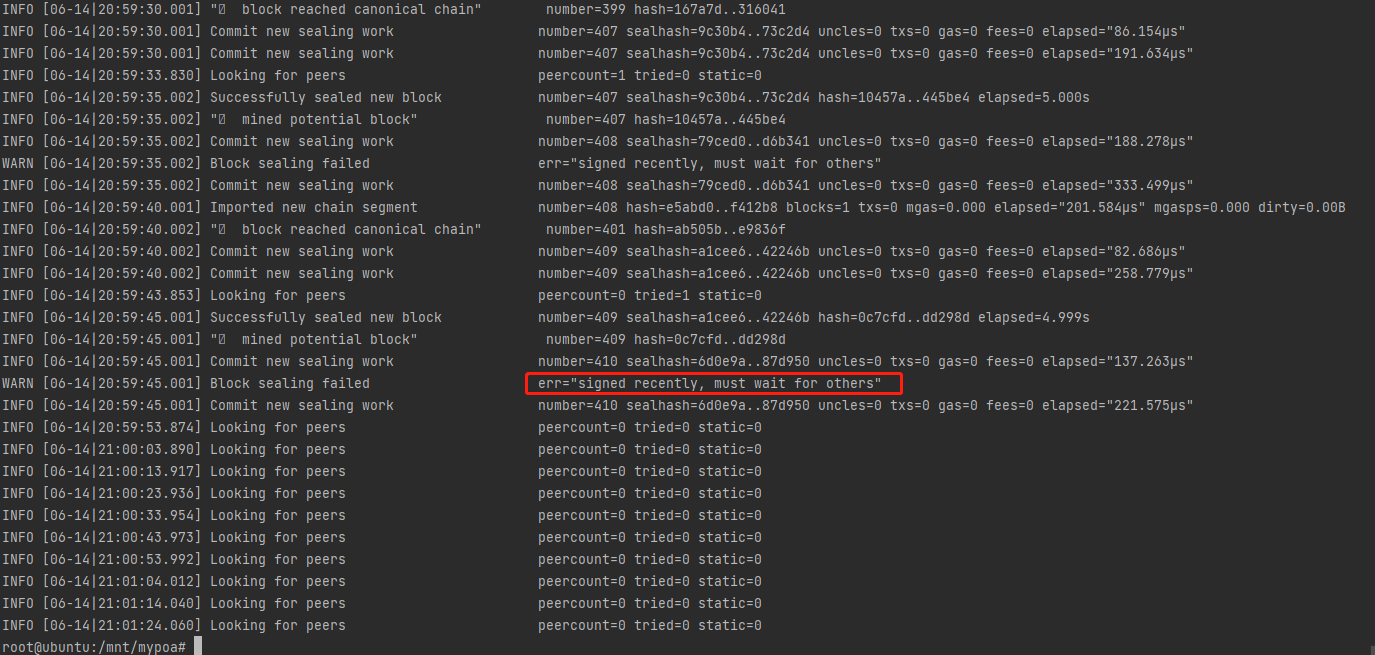
我们查看node2的日志,可以看到报错提示说必须等待其它认证者
3.4.2、测试重启节点后区块数据会不会丢失
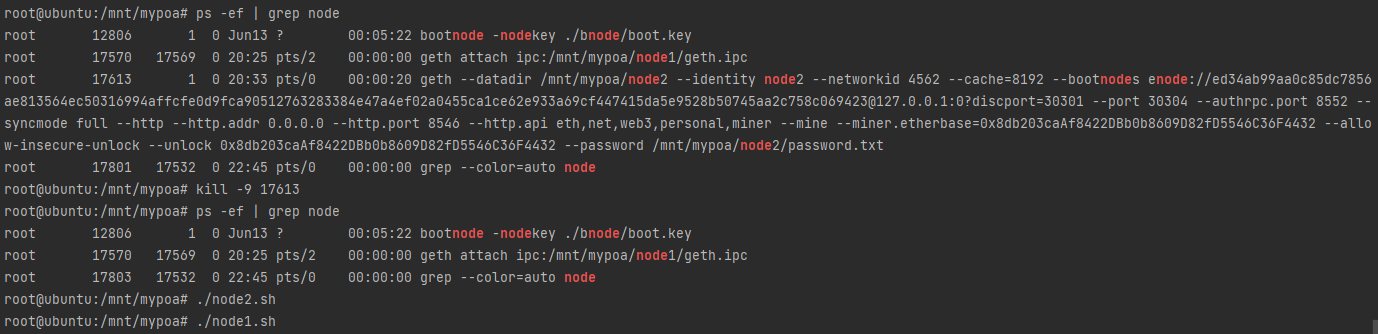
我们把node2的进程也停止,然后重启它们
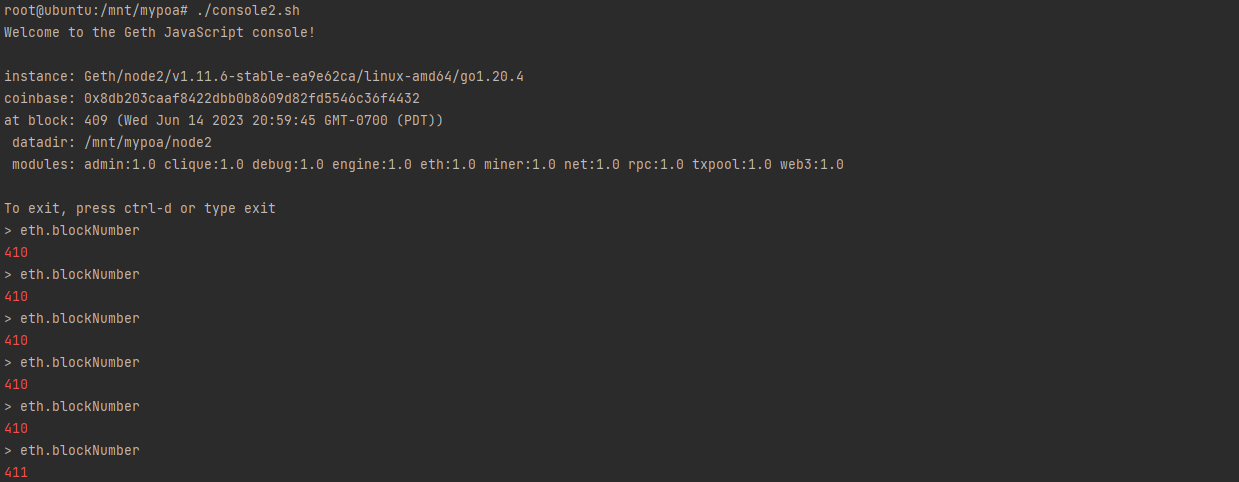
可以看到区块数据恢复,并开始产出新的区块
3.4.3、测试交易
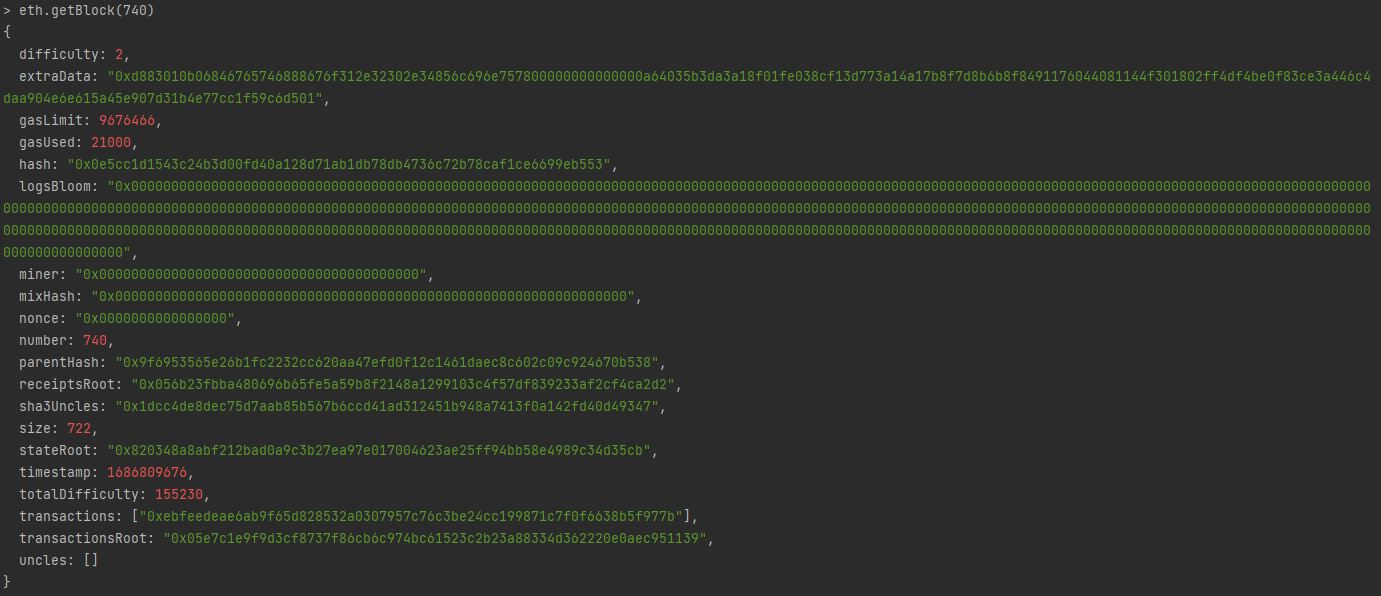
发送交易,可以看到有被打包进区块
js
eth.sendTransaction({from:eth.accounts[0],to:"0x61ace53659af04fedc8c0dbbb906932873e5931c",value:web3.toWei(1,"ether")})
eth.getTransaction("0xebfeedeae6ab9f65d828532a0307957c76c3be24cc199871c7f0f6638b5f977b")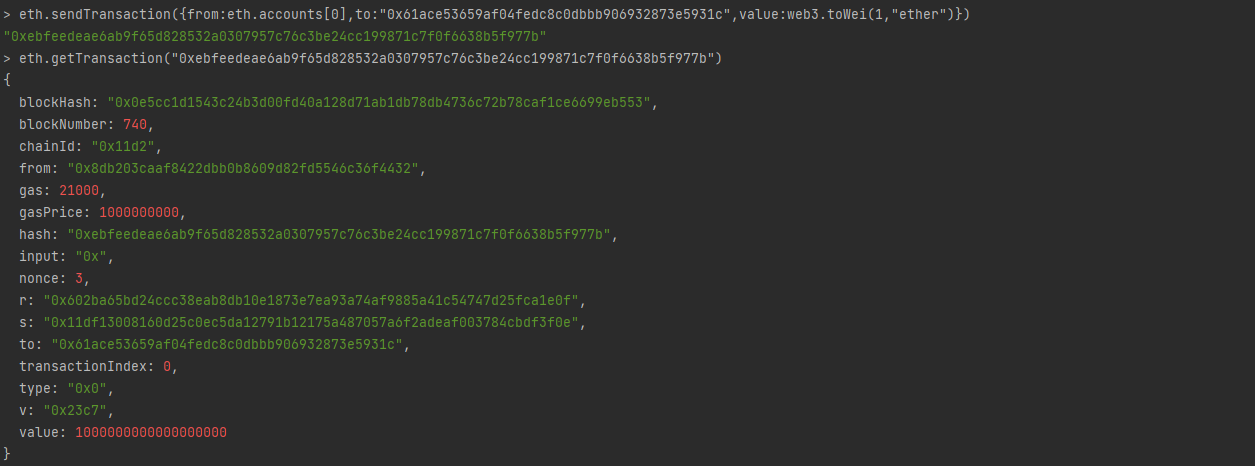
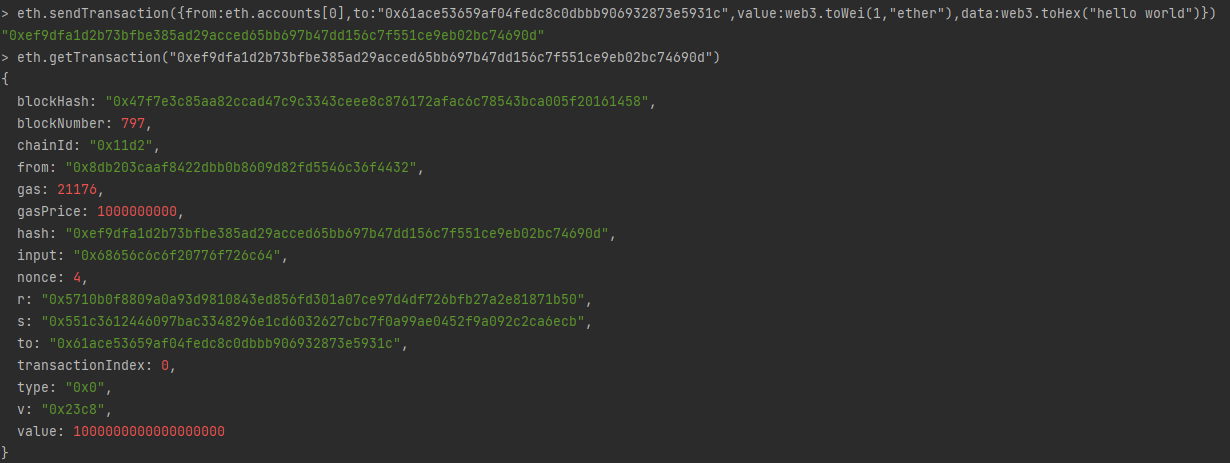
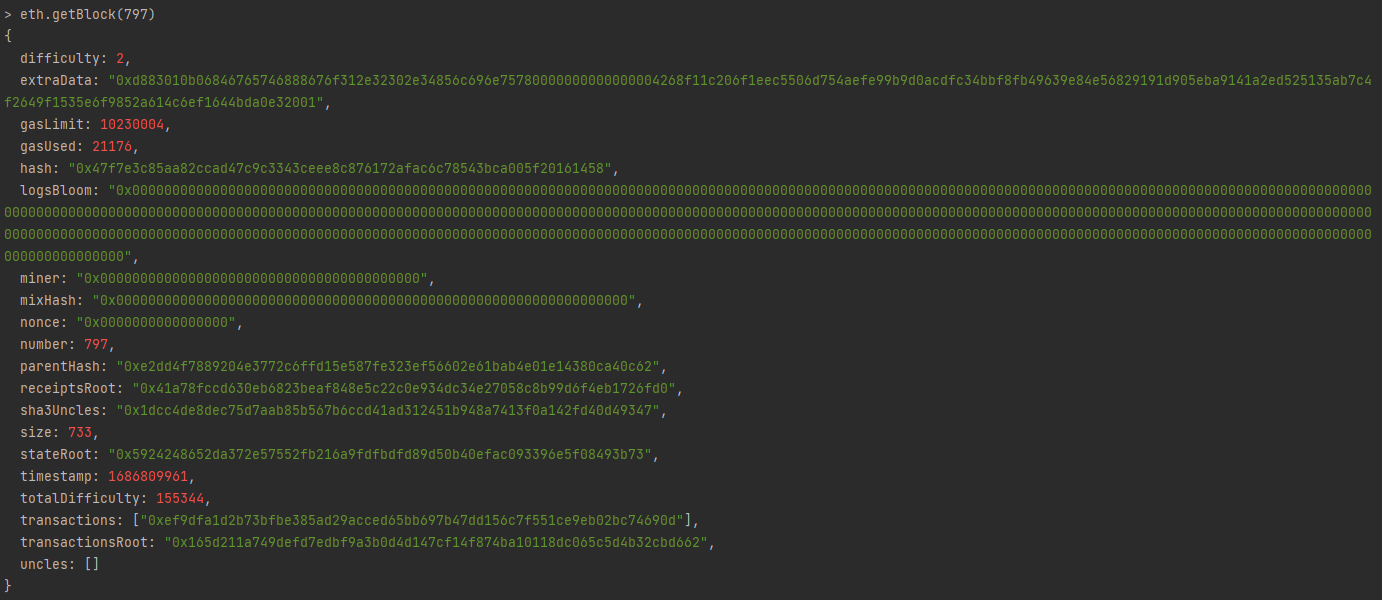
我们发送一笔带数据的交易
js
eth.sendTransaction({from:eth.accounts[0],to:"0x61ace53659af04fedc8c0dbbb906932873e5931c",value:web3.toWei(1,"ether"),data:web3.toHex("hello world")})
eth.getTransaction("0xef9dfa1d2b73bfbe385ad29acced65bb697b47dd156c7f551ce9eb02bc74690d")