Centos 7 Arm64 RPM 离线安装 MySQL
AI 摘要salmon-ai
本文详细解析了 CentOS 7 Arm64 环境下 MySQL 的离线安装流程,涵盖 MySQL 8.0 RPM 包的下载、解压、卸载系统自带 Mari
MySQL 8.0 安装教程
1、下载
访问 MySQL 官方:https://dev.mysql.com/downloads/mysql/8.0.html
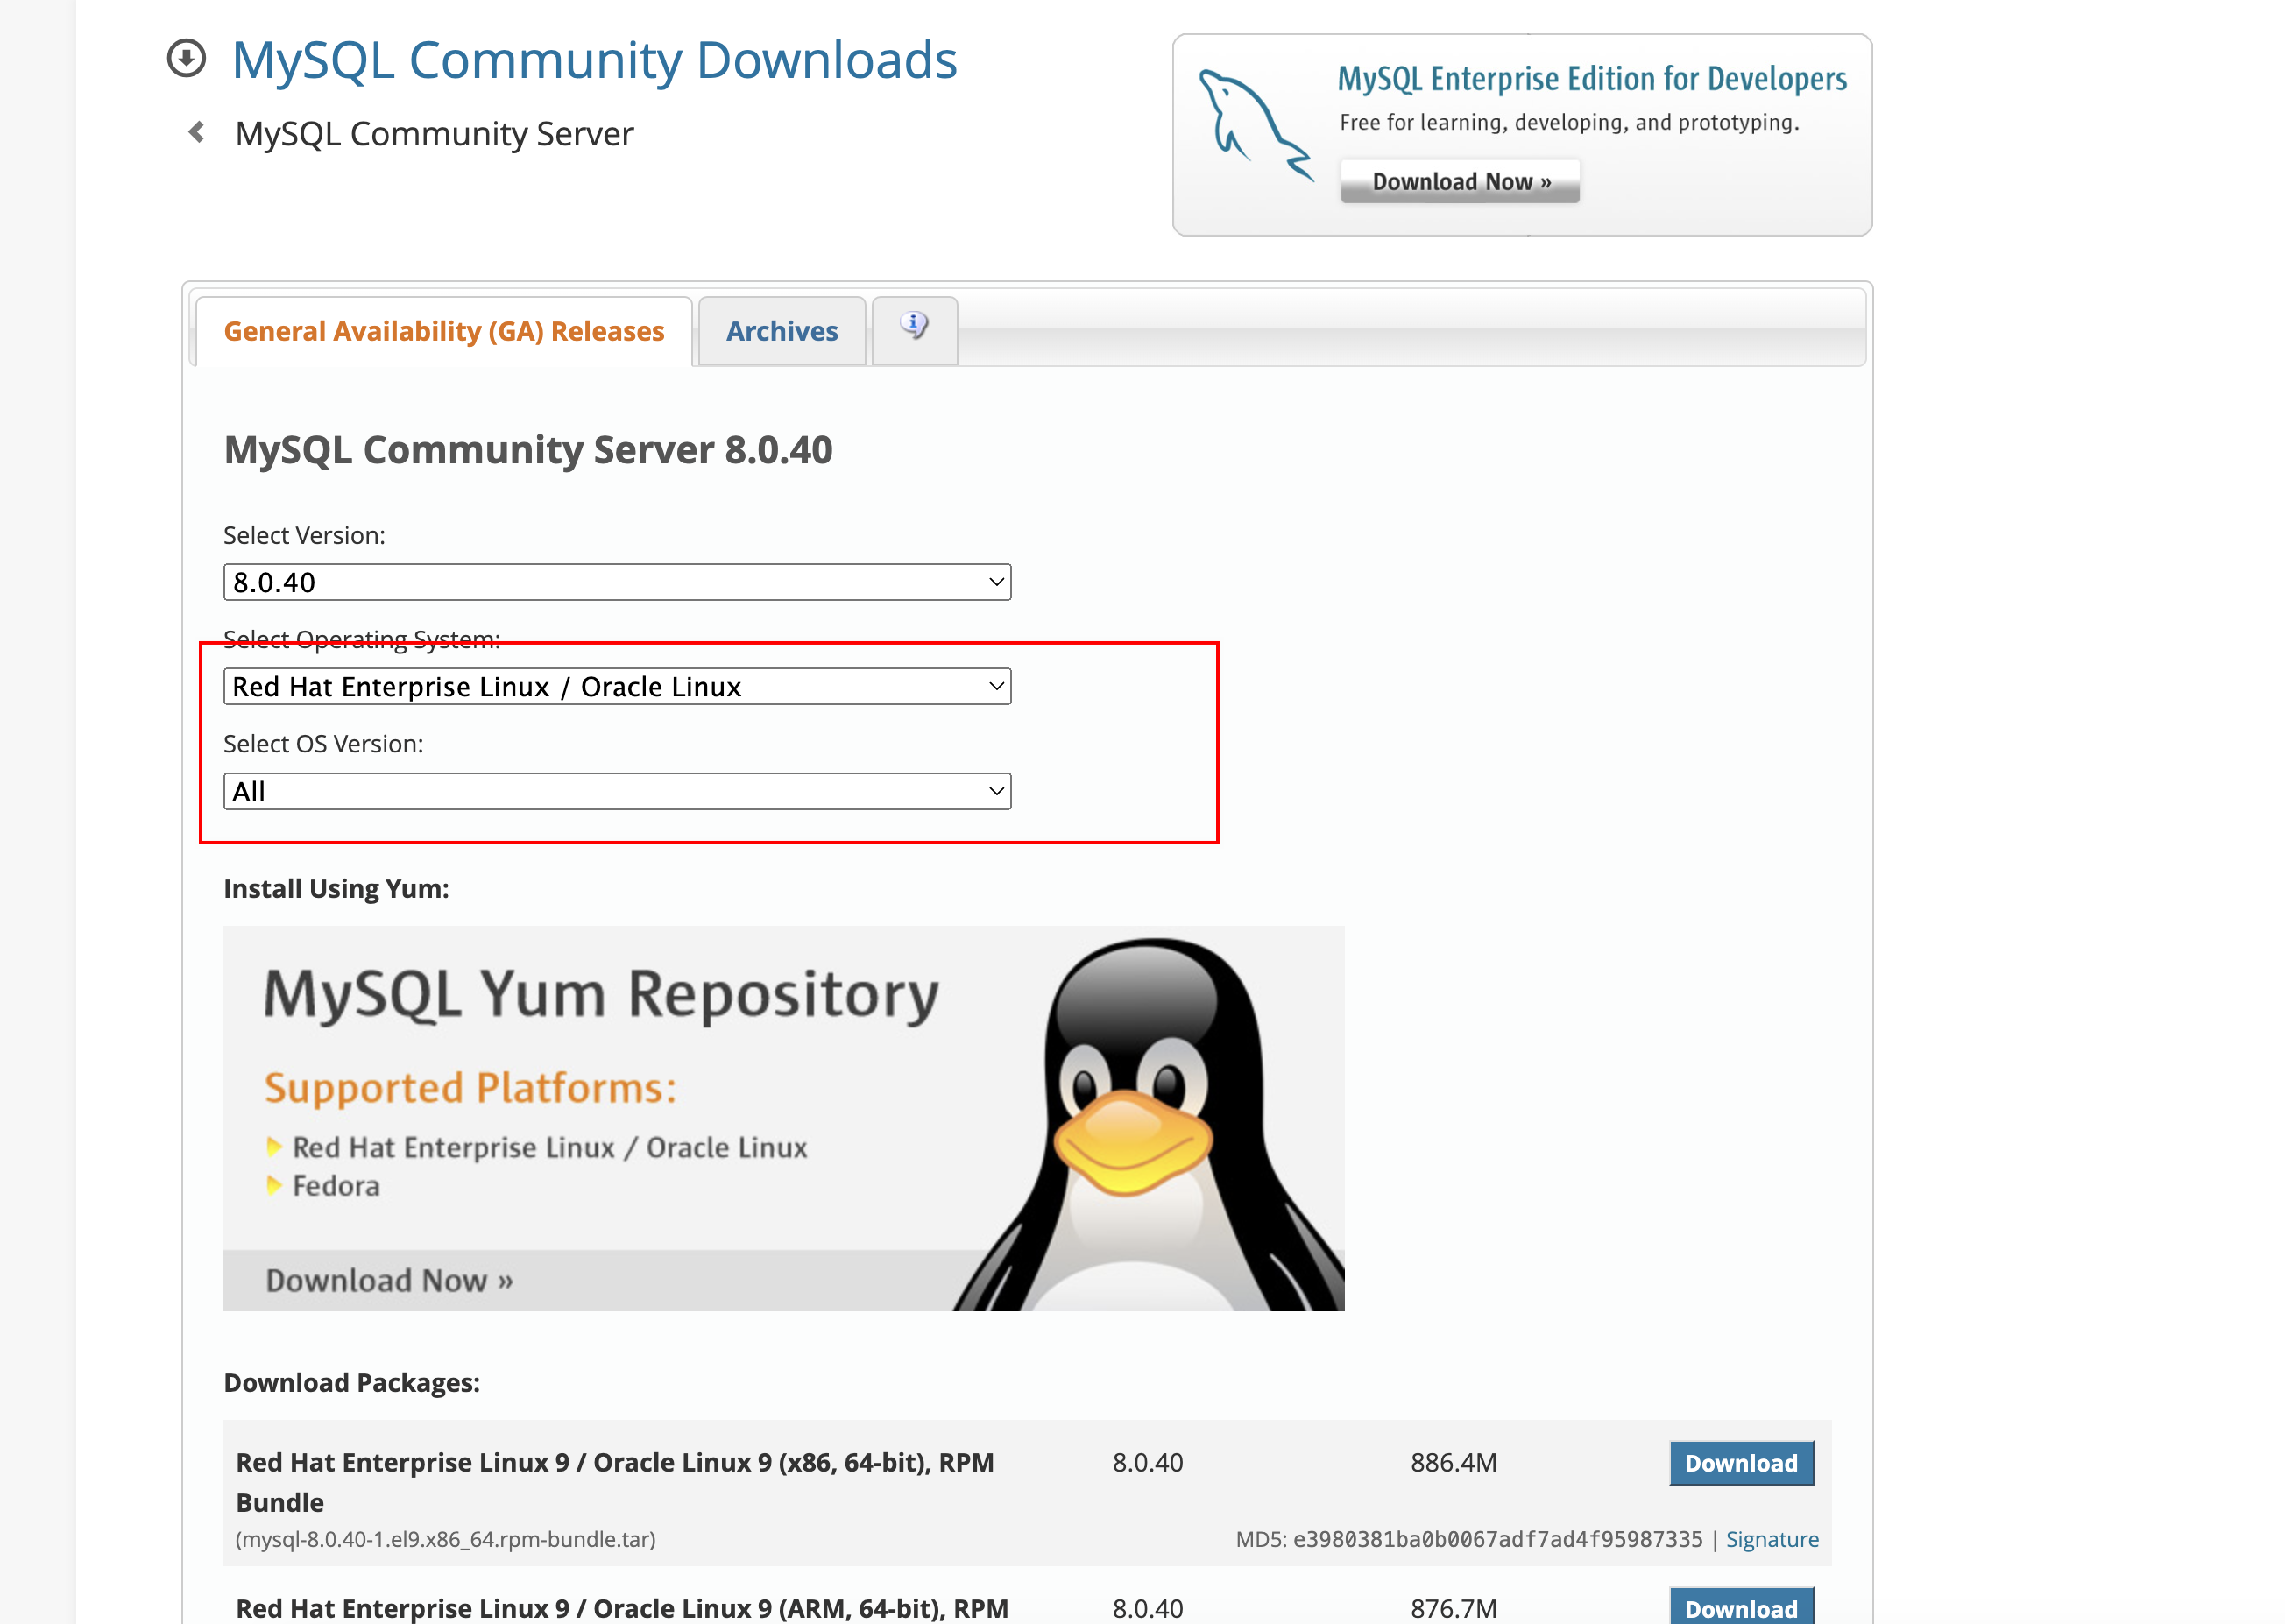
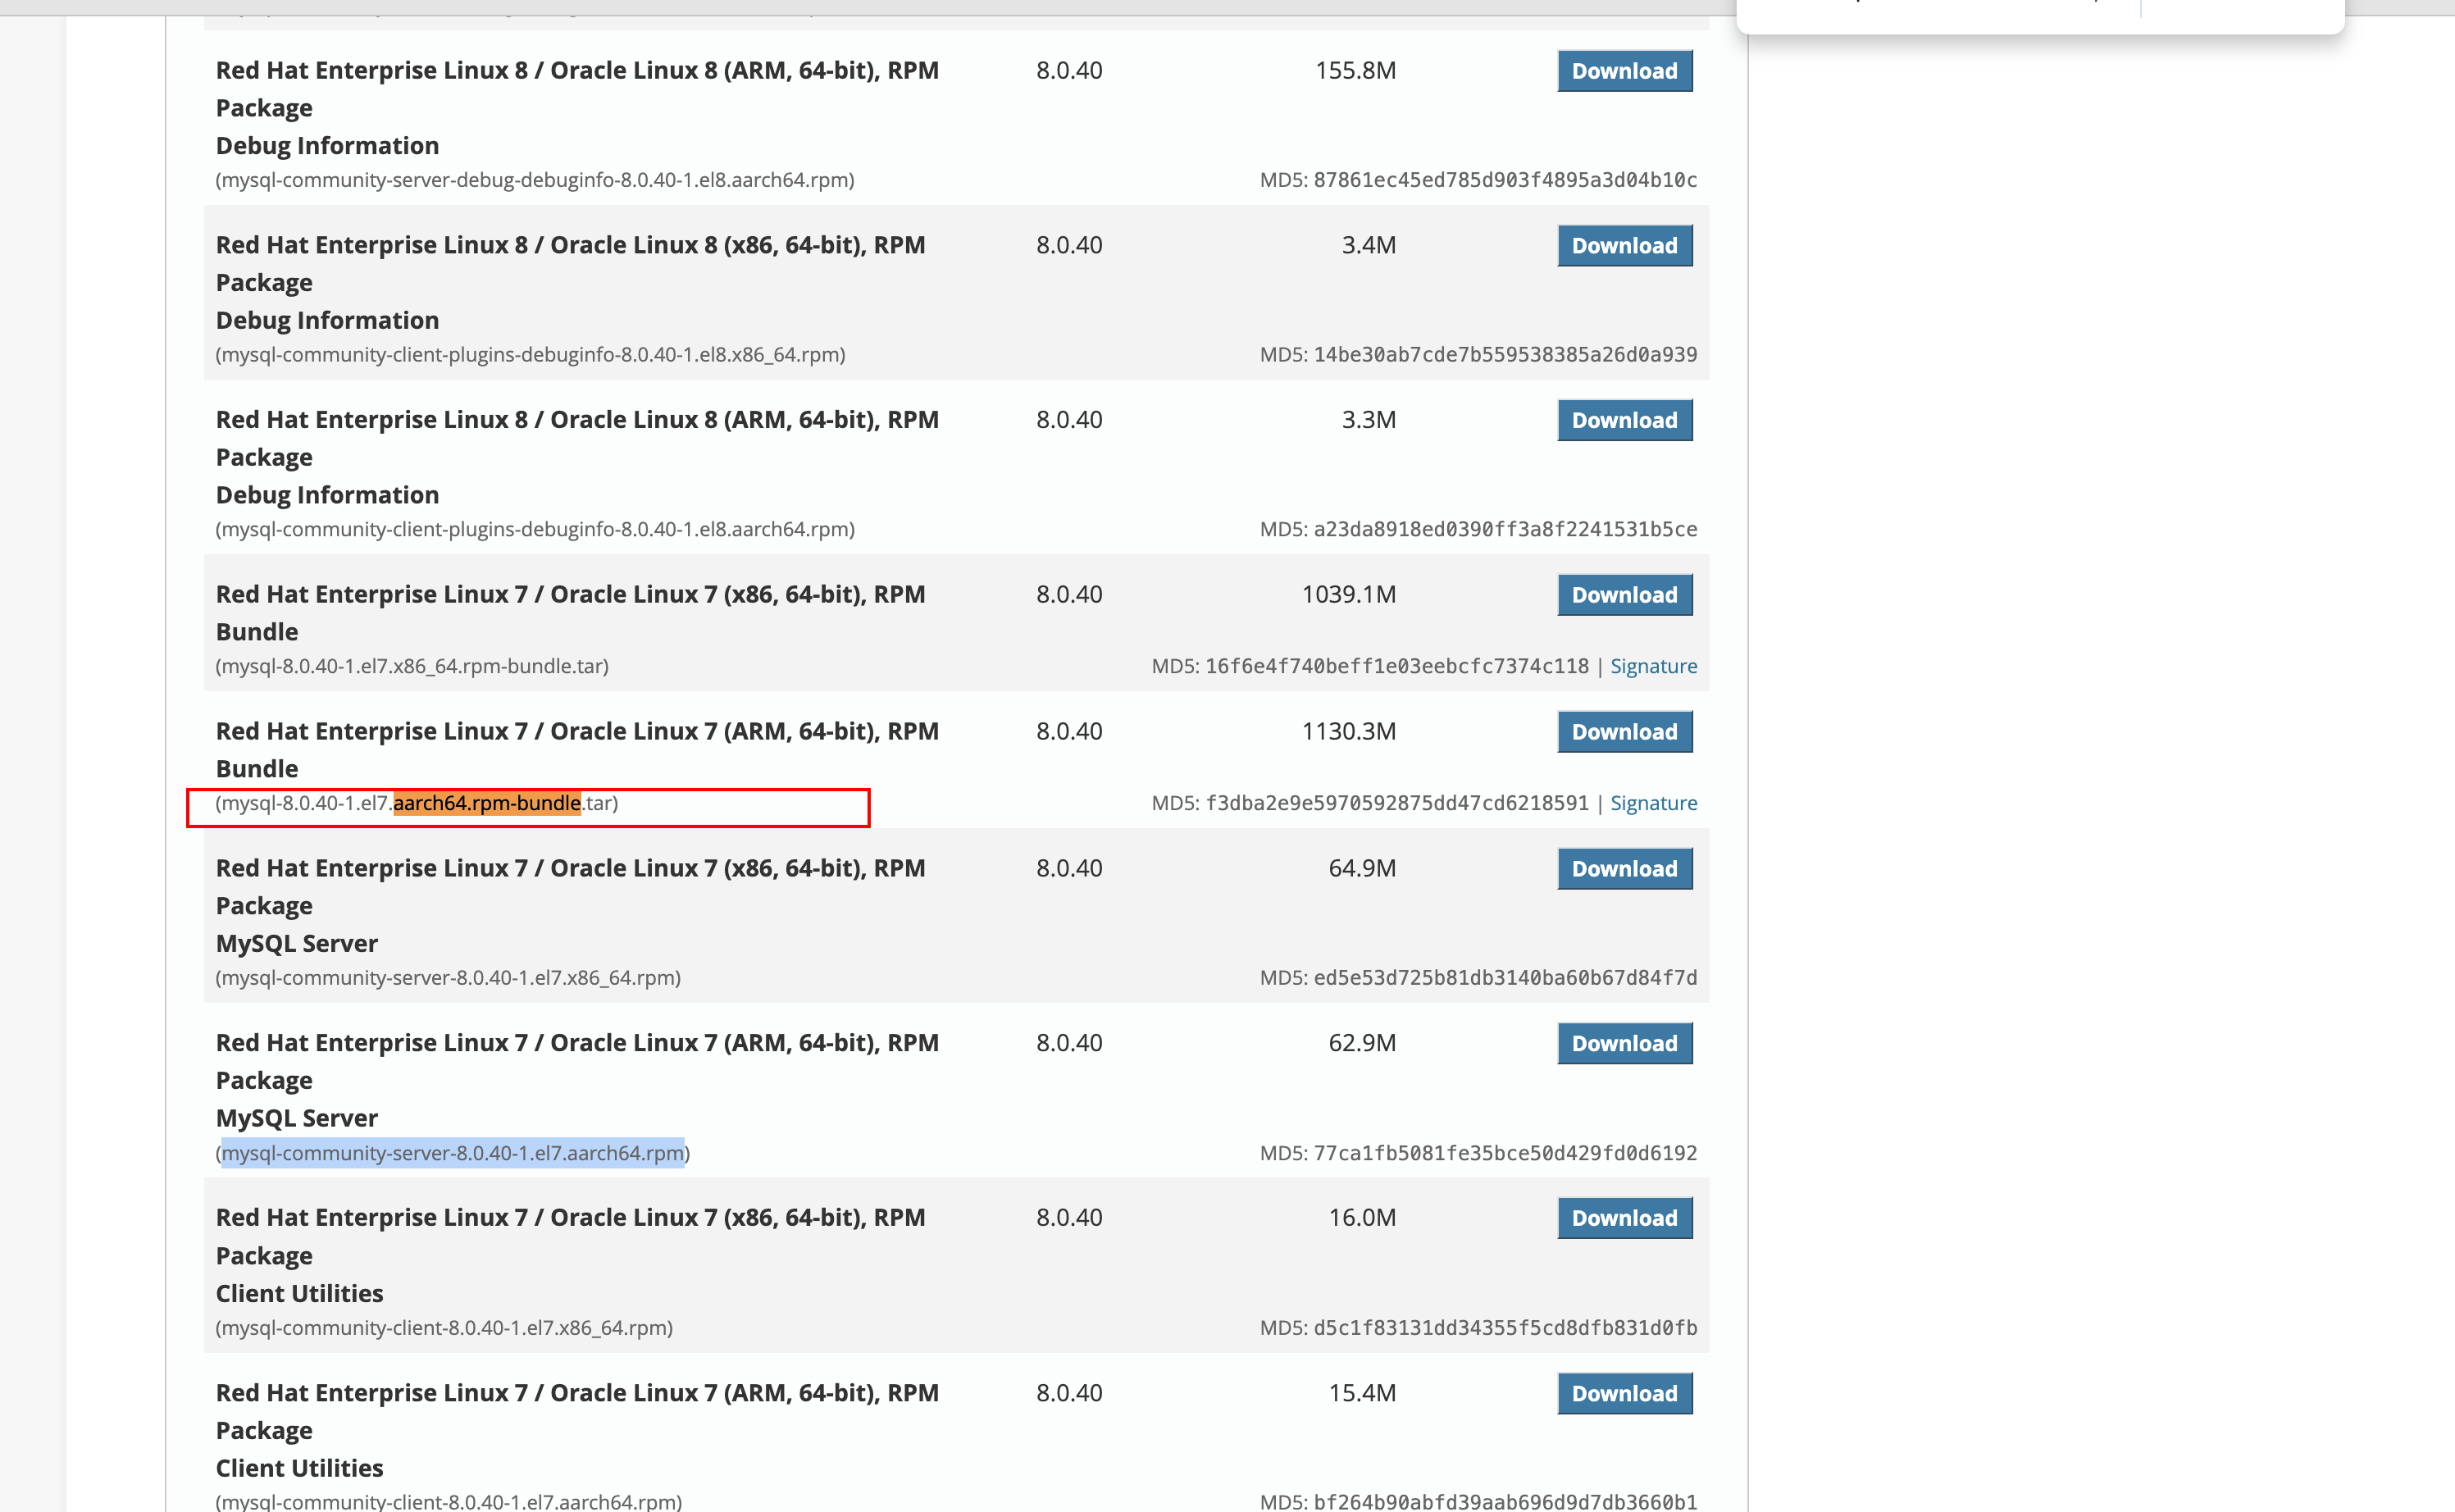
当前我下载的版本链接:https://dev.mysql.com/get/Downloads/MySQL-8.0/mysql-8.0.40-1.el7.aarch64.rpm-bundle.tar
2、解压
bash
[root@master mysql8]# tar -xvf mysql-8.0.40-1.el7.aarch64.rpm-bundle.tar
mysql-community-client-8.0.40-1.el7.aarch64.rpm
mysql-community-client-plugins-8.0.40-1.el7.aarch64.rpm
mysql-community-common-8.0.40-1.el7.aarch64.rpm
mysql-community-debuginfo-8.0.40-1.el7.aarch64.rpm
mysql-community-devel-8.0.40-1.el7.aarch64.rpm
mysql-community-embedded-compat-8.0.40-1.el7.aarch64.rpm
mysql-community-icu-data-files-8.0.40-1.el7.aarch64.rpm
mysql-community-libs-8.0.40-1.el7.aarch64.rpm
mysql-community-libs-compat-8.0.40-1.el7.aarch64.rpm
mysql-community-server-8.0.40-1.el7.aarch64.rpm
mysql-community-server-debug-8.0.40-1.el7.aarch64.rpm
mysql-community-test-8.0.40-1.el7.aarch64.rpm
3、卸载系统自带的 MariaDB
bash
rpm -qa | grep mariadb
rpm -e mariadb-libs-5.5.68-1.el7.aarch64 --nodeps
4、按照以下顺序安装
bash
rpm -ivh mysql-community-common-8.0.40-1.el7.aarch64.rpm
rpm -ivh mysql-community-client-plugins-8.0.40-1.el7.aarch64.rpm
rpm -ivh mysql-community-libs-8.0.40-1.el7.aarch64.rpm
rpm -ivh mysql-community-libs-compat-8.0.40-1.el7.aarch64.rpm
rpm -ivh mysql-community-client-8.0.40-1.el7.aarch64.rpm
rpm -ivh mysql-community-icu-data-files-8.0.40-1.el7.aarch64.rpm
rpm -ivh mysql-community-server-8.0.40-1.el7.aarch64.rpm
rpm -ivh mysql-community-devel-8.0.40-1.el7.aarch64.rpm
rpm -ivh mysql-community-embedded-compat-8.0.40-1.el7.aarch64.rpm
5、配置 my.cnf
我们可以修改 my.cnf 文件
bash
[mysql]
#设置mysql客户端默认字符集
default-character-set=UTF8MB4
[mysqld]
#设置3306端口
port=3306
#允许最大连接数
max_connections=200
#允许连接失败的次数
max_connect_errors=10
#默认使用“mysql_native_password”插件认证
default_authentication_plugin=mysql_native_password
#服务端使用的字符集默认为8比特编码的latin1字符集
character-set-server=UTF8MB4
#开启查询缓存
explicit_defaults_for_timestamp=true
#创建新表时将使用的默认存储引擎
default-storage-engine=INNODB
#等待超时时间秒
wait_timeout=60
#交互式连接超时时间秒
interactive-timeout=6006、启动 MySQL
启动 MySQL
bash
[root@master mysql8]# service mysqld start
Redirecting to /bin/systemctl start mysqld.service
检查状态
bash
service mysqld status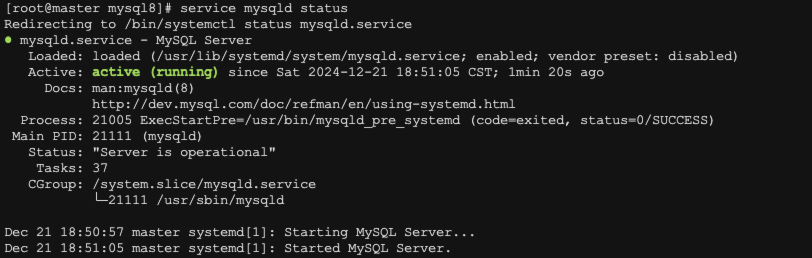
7、修改默认密码
查看默认密码
bash
[root@master mysql8]# grep 'temporary password' /var/log/mysqld.log
2024-12-21T10:51:03.224837Z 6 [Note] [MY-010454] [Server] A temporary password is generated for root@localhost: sfvXFJip(1k(
登录 MySQL
bash
mysql -u root -p修改密码,发现报错,原因是 MySQL 默认启用了密码验证插件(validate_password)
sql
mysql> alter user 'root'@'localhost' identified by '123456';
ERROR 1819 (HY000): Your password does not satisfy the current policy requirements
可以先设置个复杂密码
sql
alter user 'root'@'localhost' identified by 'Ss123456+';查看当前策略
sql
mysql> SHOW VARIABLES LIKE 'validate_password%';
+-------------------------------------------------+--------+
| Variable_name                                   | Value  |
+-------------------------------------------------+--------+
| validate_password.changed_characters_percentage | 0      |
| validate_password.check_user_name               | ON     |
| validate_password.dictionary_file               |        |
| validate_password.length                        | 8      |
| validate_password.mixed_case_count              | 1      |
| validate_password.number_count                  | 1      |
| validate_password.policy                        | MEDIUM |
| validate_password.special_char_count            | 1      |
+-------------------------------------------------+--------+
8 rows in set (0.00 sec)
依次执行以下语句解除限制:
sql
SET GLOBAL validate_password.policy = 0;
SET GLOBAL validate_password.length = 4;
SET GLOBAL validate_password.mixed_case_count = 0;
SET GLOBAL validate_password.number_count = 0;
SET GLOBAL validate_password.special_char_count = 0;
重新设置密码就成功啦
sql
alter user 'root'@'localhost' identified by '123456';
8、开启远程连接
sql
use mysql;
update user set host='%' where user ='root';
FLUSH PRIVILEGES;
GRANT ALL PRIVILEGES ON *.* TO 'root'@'%'WITH GRANT OPTION;
9、远程连接
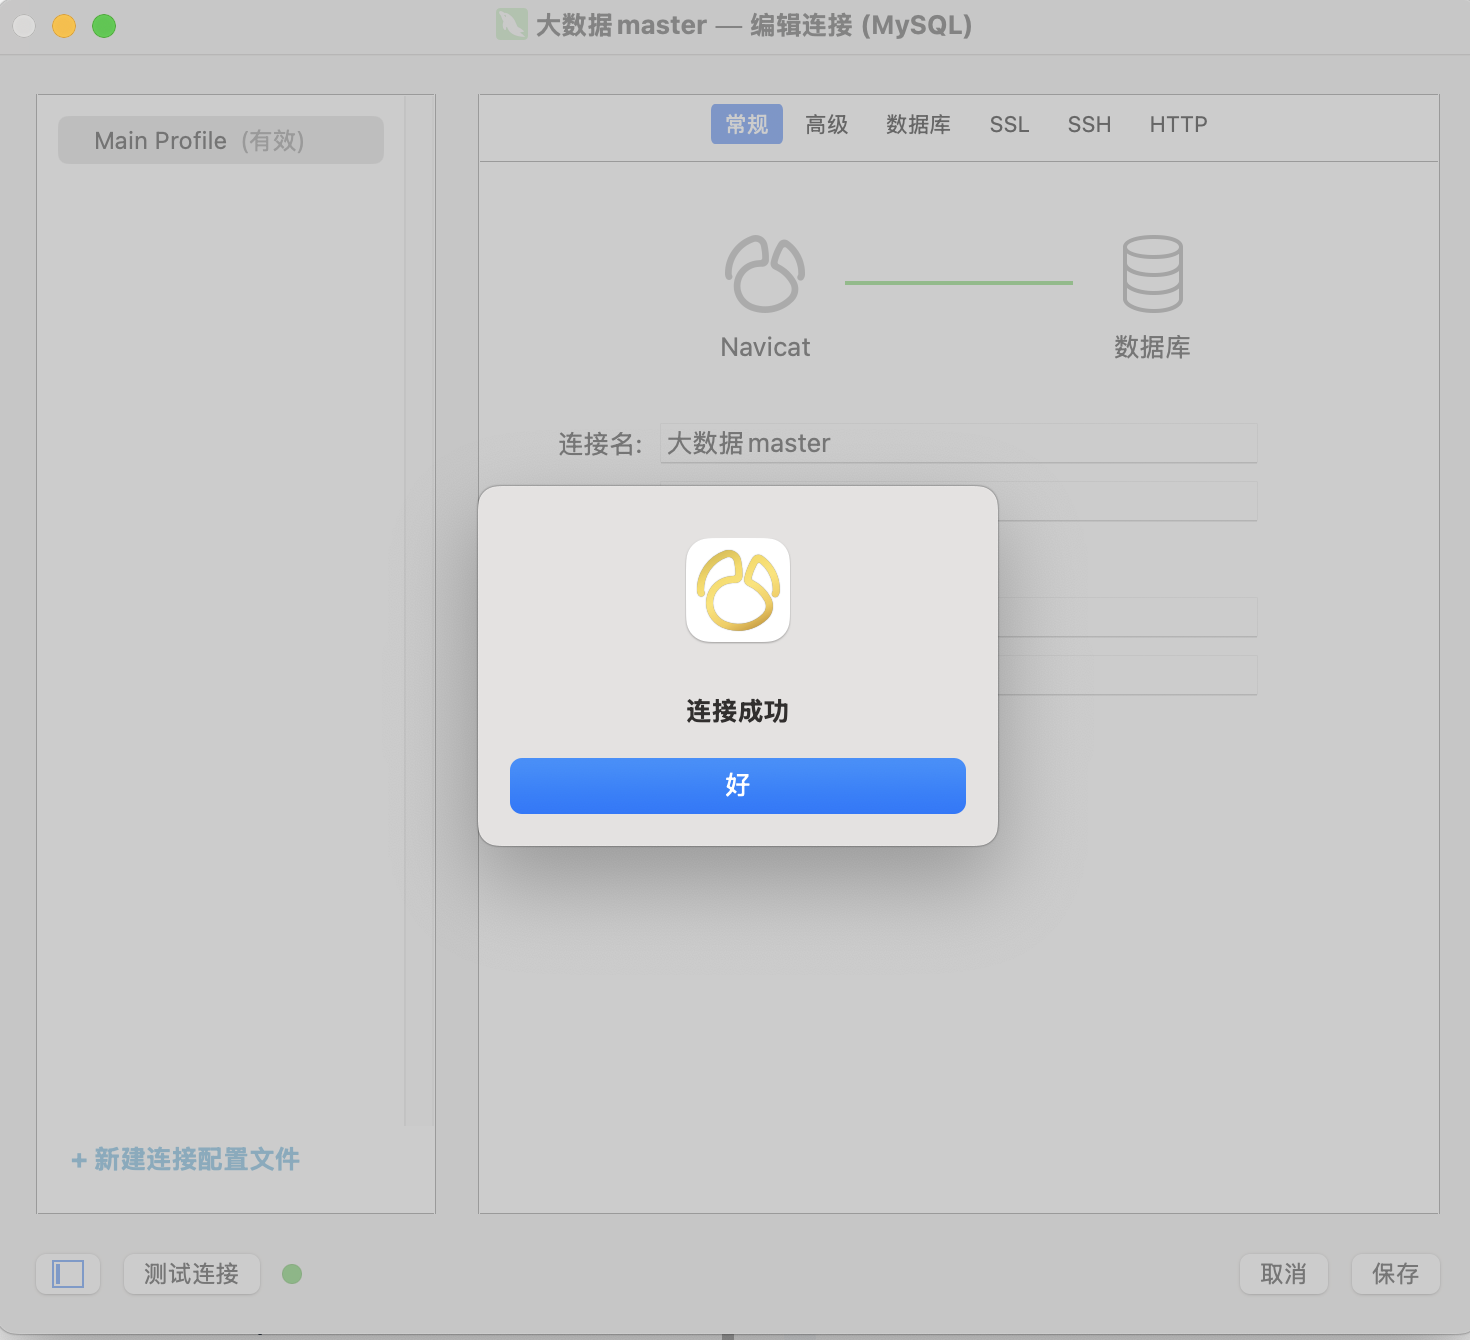
使用 Navicat 测试连接,可以看到连接成功啦
MySQL 5.6 安装教程
1、下载
安装依赖库
bash
yum install -y libaio*下载 MySQL
bash
wget https://obs.cn-north-4.myhuaweicloud.com/obs-mirror-ftp4/database/mysql-5.6.44-aarch64.tar.gz2、解压
bash
tar xzvf mysql-5.6.44-aarch64.tar.gz -C /usr/local/3、配置
bash
mv /usr/local/mysql-5.6.44-aarch64 /usr/local/mysql
mkdir -p /usr/local/mysql/logs
mkdir -p /data/mysql
chown -R mysql:mysql /usr/local/mysql
chown -R mysql:mysql /data/mysql
4、安装 autoconf
bash
rpm -qa | grep autoconf
yum install -y autoconf
5、初始化数据库
bash
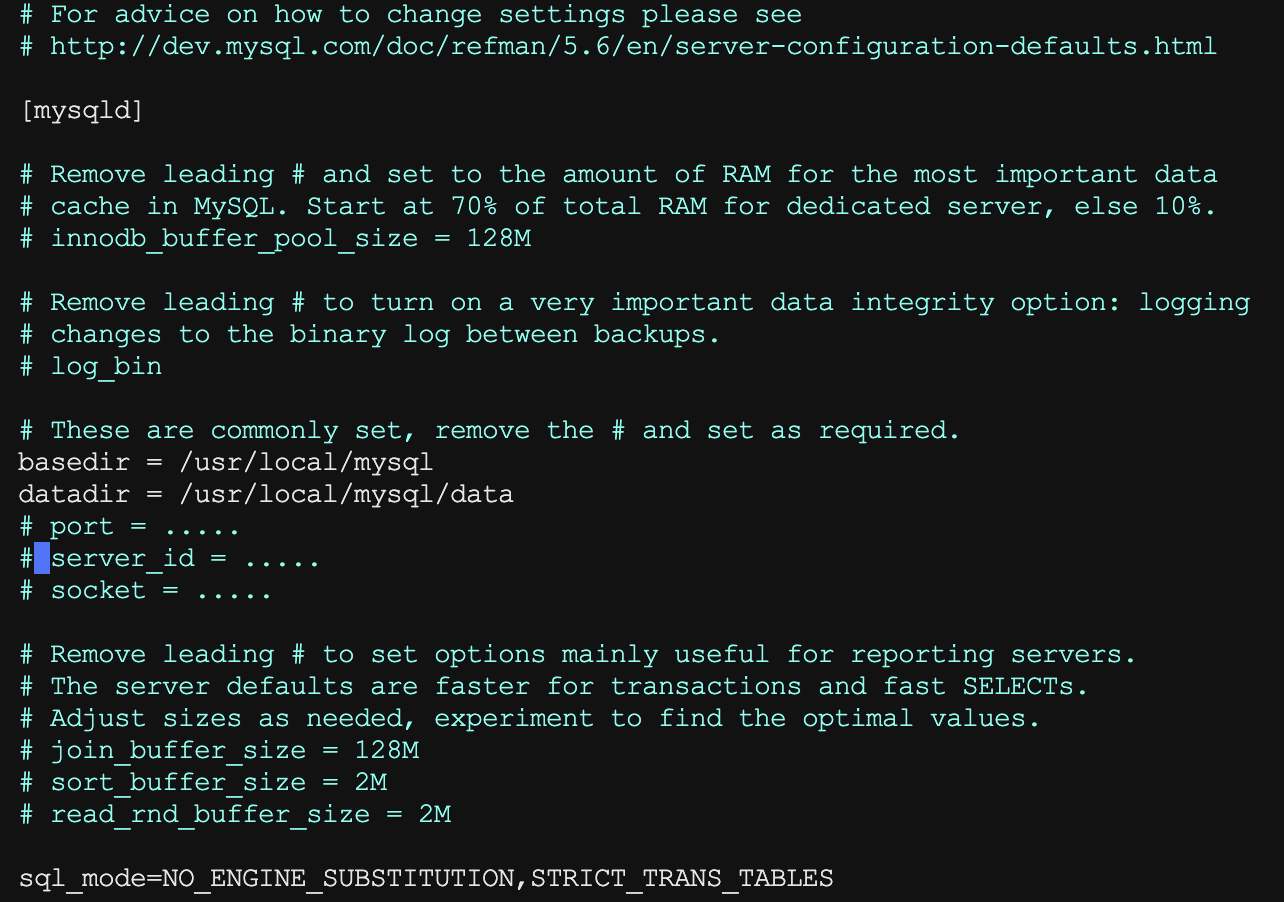
/usr/local/mysql/scripts/mysql_install_db --user=mysql这里会在 /usr/local/mysql 目录底下生成一个 my-new.cnf 文件,修改名字为 my.cnf,同时修改里面的内容
bash
ln -sf /usr/local/mysql/my.cnf /etc/my.cnf6、设置开机启动
bash
cp -rf /usr/local/mysql/support-files/mysql.server /etc/init.d/mysqld
chmod +x /etc/init.d/mysqld
systemctl enable mysqld
7、添加环境变量
bash
vim /etc/profile

## 添加下面两行内容
export MYSQL_HOME=/usr/local/mysql
export PATH=$PATH:$MYSQL_HOME/bin

source /etc/profile
8、启动
bash
# 启动mysql
systemctl start mysqld

# 检查启动情况
systemctl status mysqld评论
0 条—
还没有评论,来说第一句